
Konica Minolta copier on Windows
The printer address is printer.arpa at every office — it resolves to the master unit wherever you are connected. Your copier code is a zero followed by the last four digits of your cell phone number.
Step 1) Download the Konica Minolta Windows driver (25 MB) Select save location to somewhere you can get to such as your desktop or downloads folder. Once download has completed navigate to download location
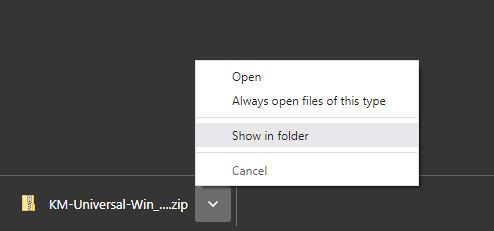
> Extract All...
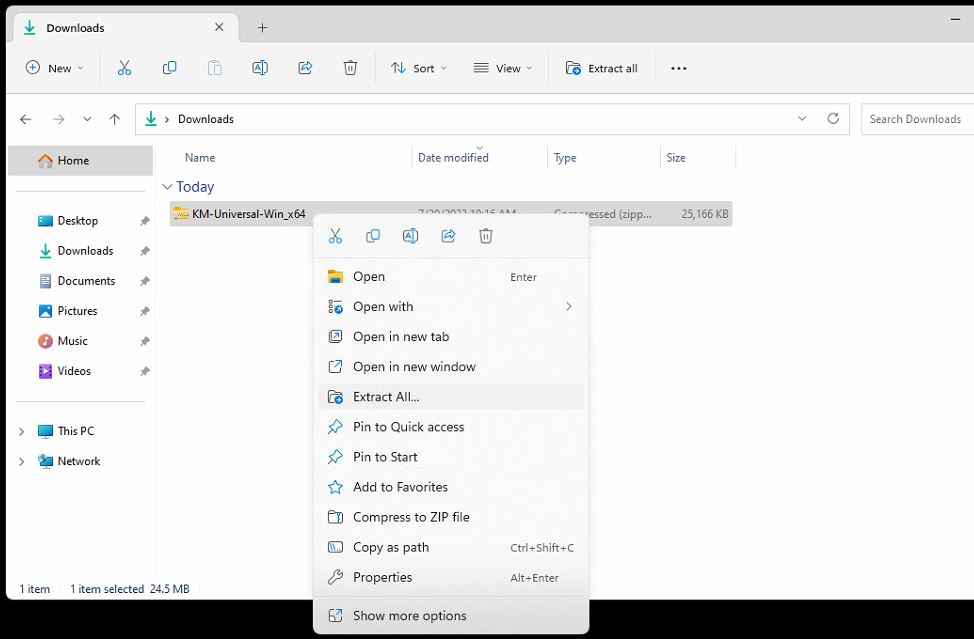
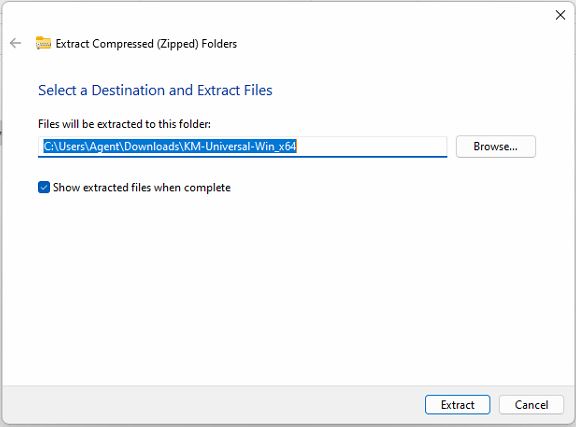
> Extract
Step 2) Navigate to Control Panel
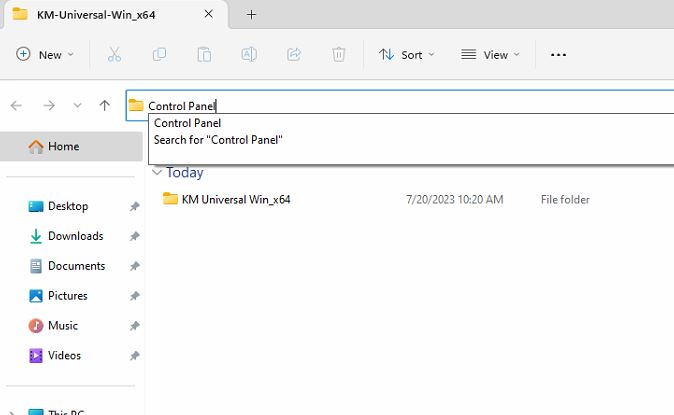
> Select View devices and printers
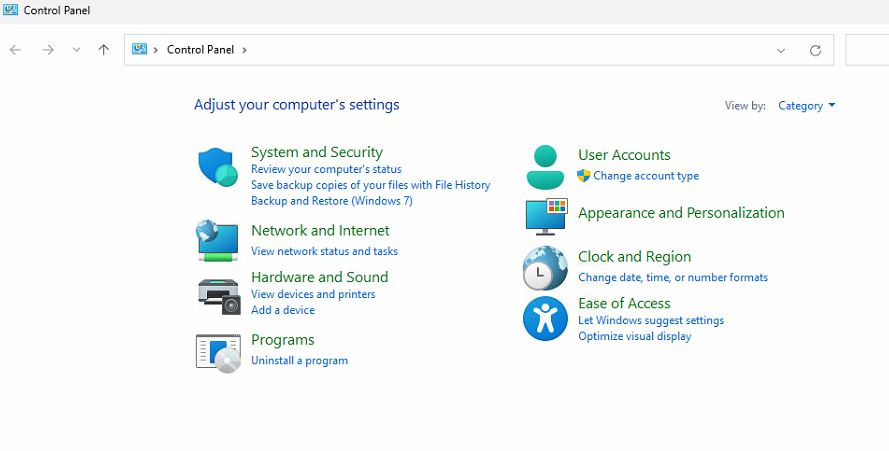
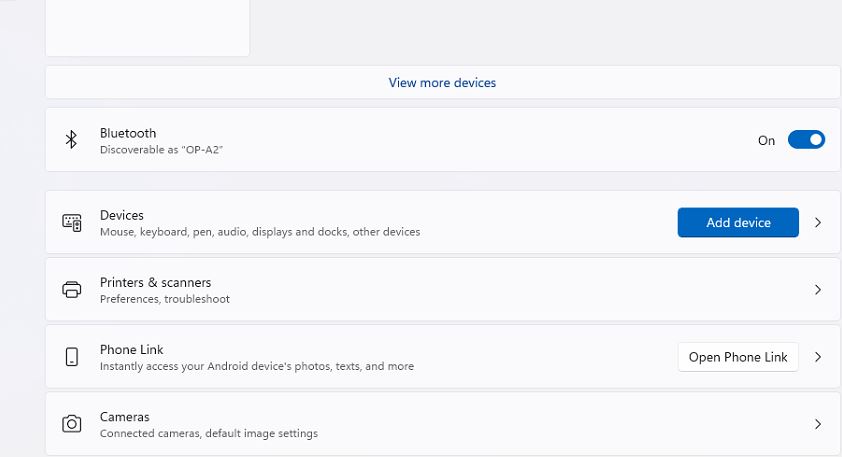
> Select Printers & scanners
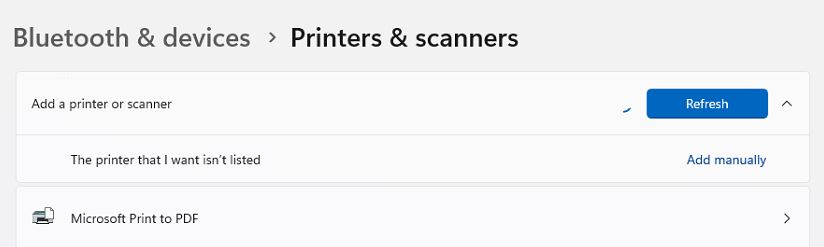
> After a few seconds, Select Add manually
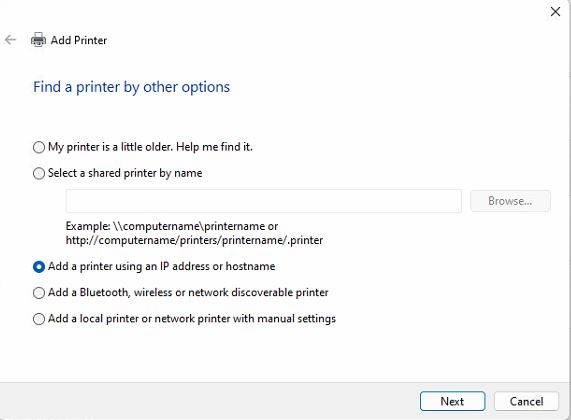
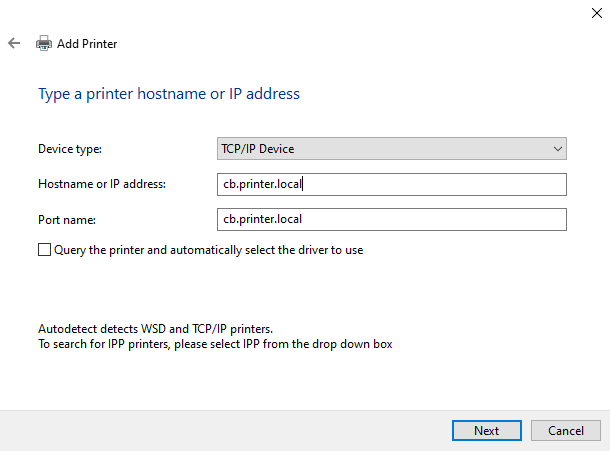
Step 3) Select Add a printer using an IP address or hostname, click Next
> Click the drop down and select: Device type: TCP/IP Device Hostname or IP address: printer.arpa Click Next
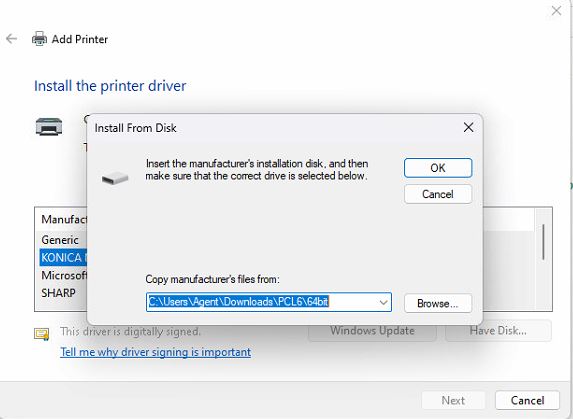
> Select Have Disk... then Browse...
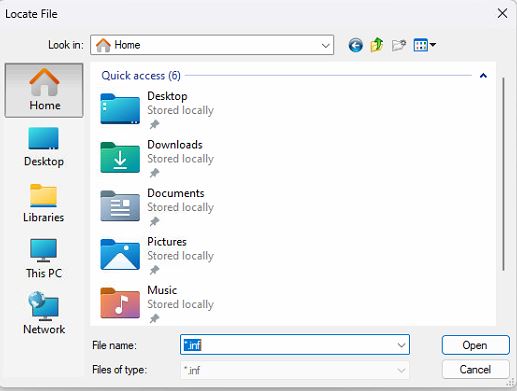
> Navigate to the extracted driver folder, in this example we extracted it to the Downloads folder Click Home > Downloads
> Open KM-Universal-Win_x64 folder
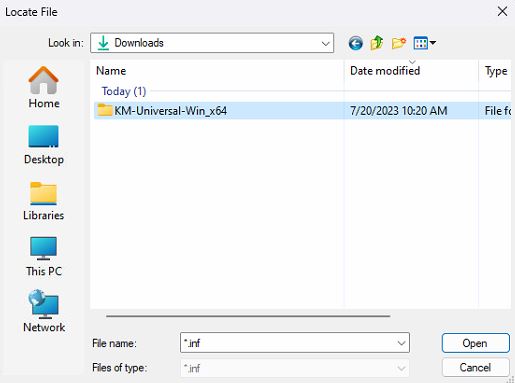
> Select KOAX7J_ then click Open
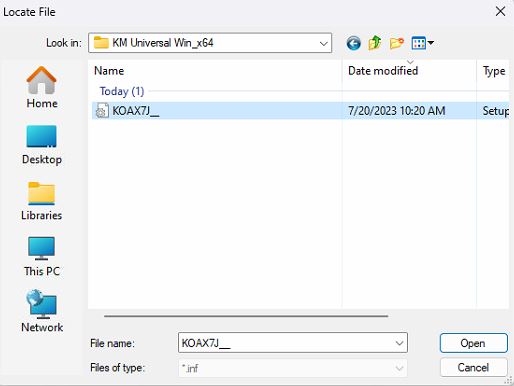
> Select KONICA MINOLTA Universal PCL > Next
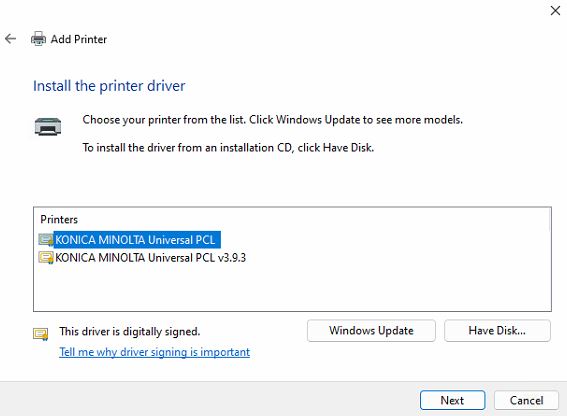
> Name the copier what you would like to call it, in this example we will leave it the default, Click Next
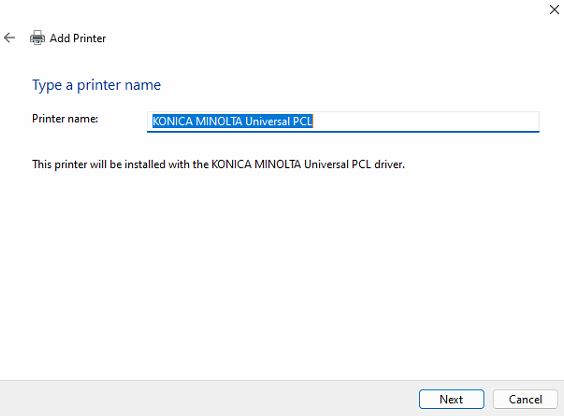
> Make sure to select Do not share this printer , Click Next
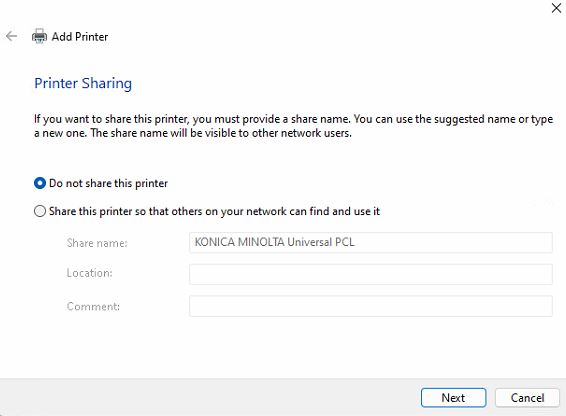
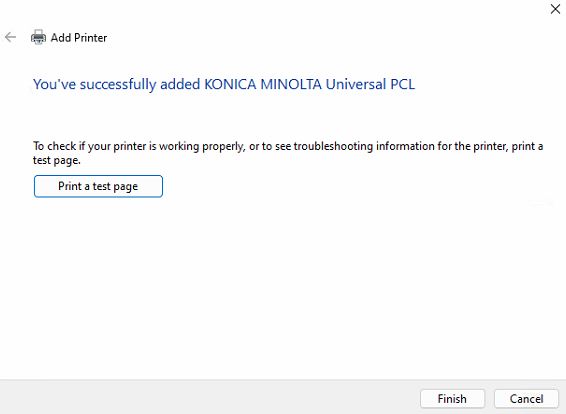
> Select Finish
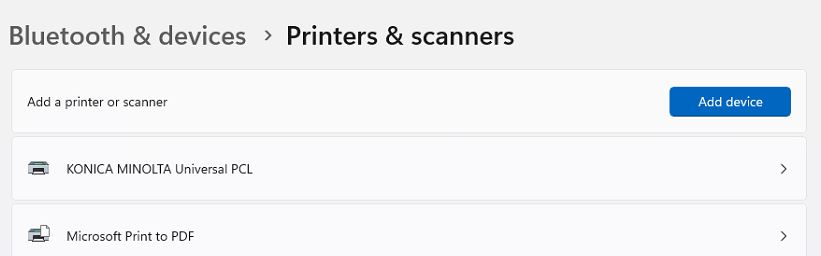
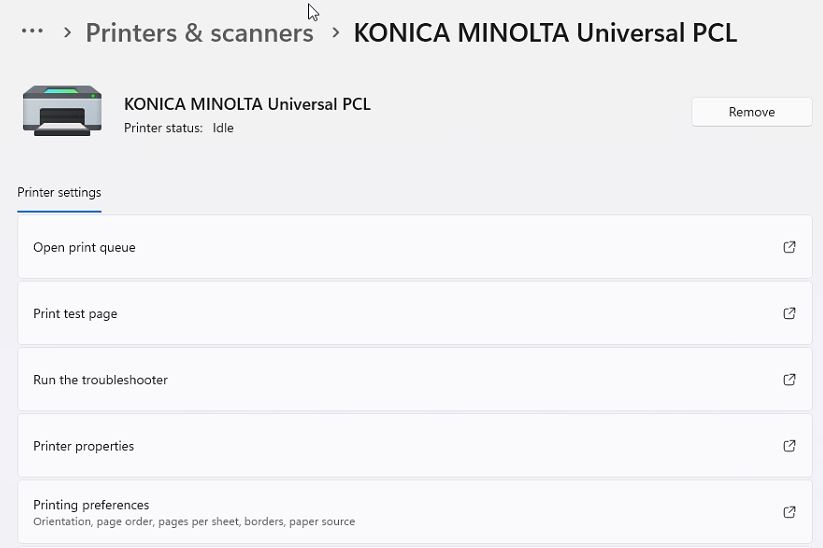
Step 4 (optional) Turn off two sided printing by selecting the newly installed KONICA MINOLTA
> Select Printer preferences
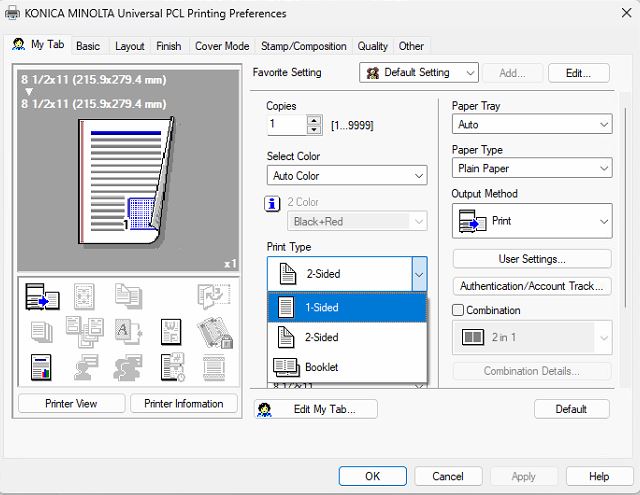
> Click drop down Print Type: 1-Sided, Click Apply > OK
To verify everything was configured correctly, select Print a test page, then verify at the copier that your test print has successfully printed. If you have any issues with this process or questions, please feel free to submit a ticket to helpdesk@coldwellhomes.com
Stuck at any step? Email helpdesk@coldwellhomes.com or call 920-993-4515 (WI), 815-553-2418 (IL) or 260-416-5128 (IN).
← All copier driver guides · Printing from a phone or tablet