Hello Agents it has come to our attention that some of your computers may not have the correct settings for our Sharp Printers. To eliminate issues with the printers we are requiring that everyone check these settings on their computers (Click here for a printable version of this guide):
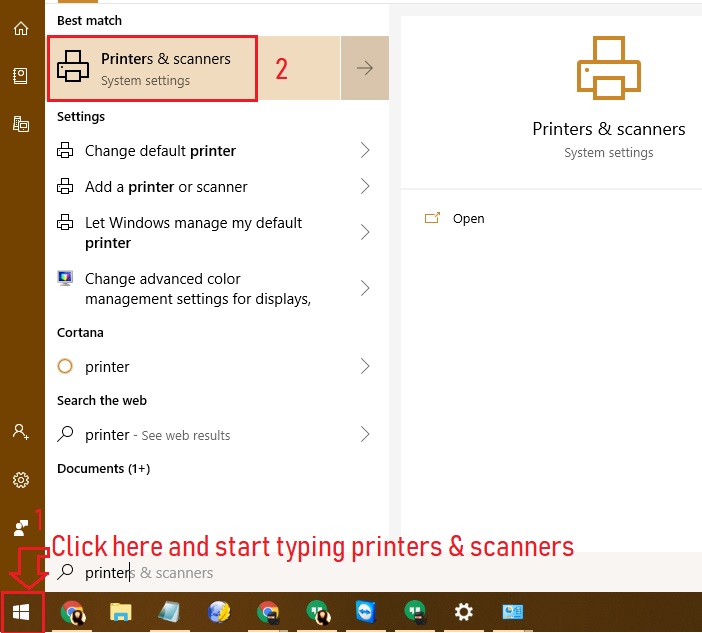
- Click your start button and just type the word PRINTERS & SCANNERS
and click PRINTERS & SCANNERS when it appears.
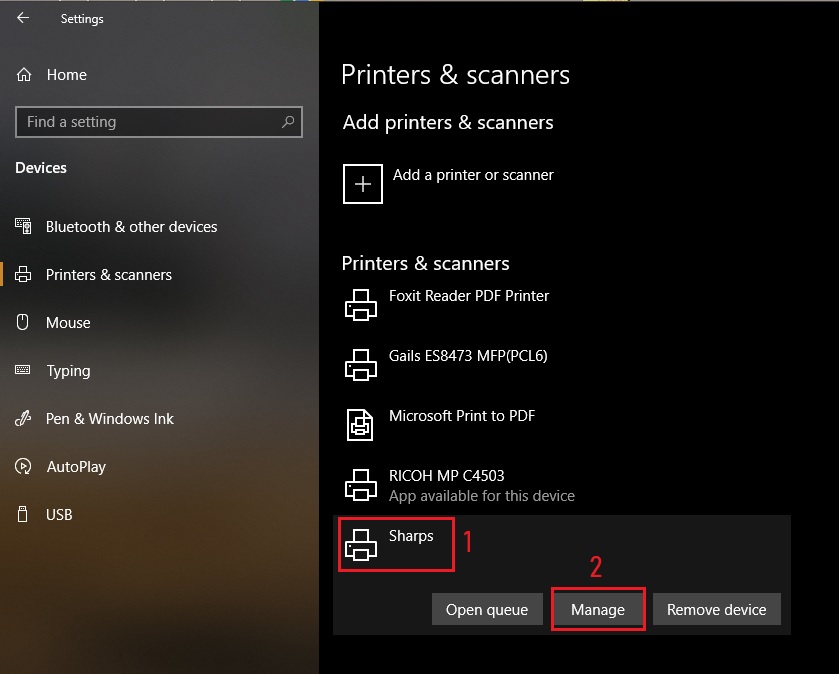
- Click SHARPS and then MANAGE
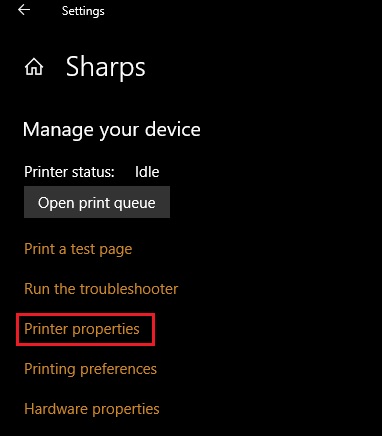
- Click PRINTER PROPERTIES
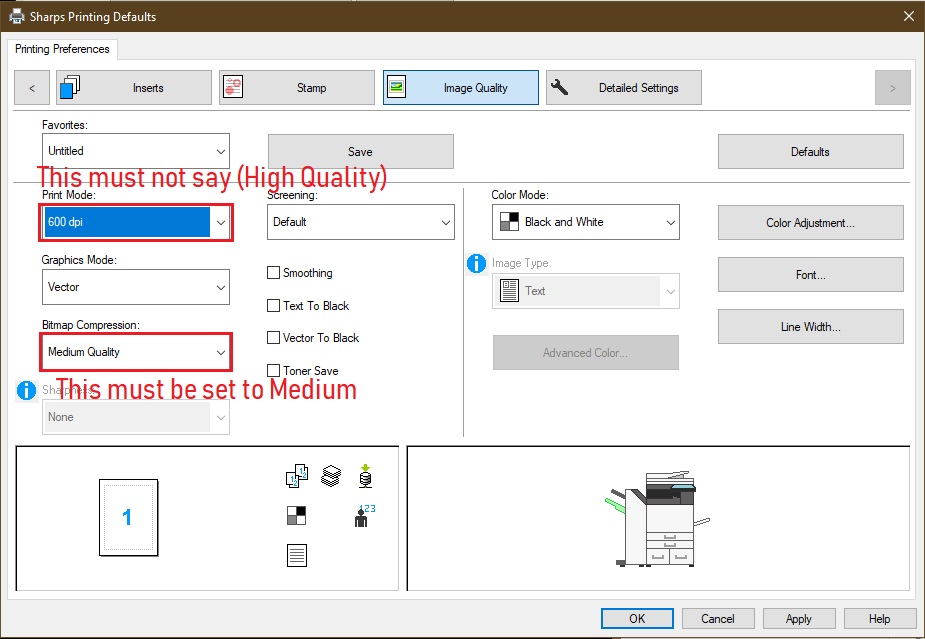
- Click ADVANCED and verify the driver is PCL6 not PS (if it is contact the IT Helpdesk) then PRINTING DEFAULTS

- Click IMAGE QUALITY and ensure PRINT MODE is set to 600 dpi and BITMAP COMPRESSION is set to MEDIUM QUALITY then click OK
Set Chrome to always use the system dialog
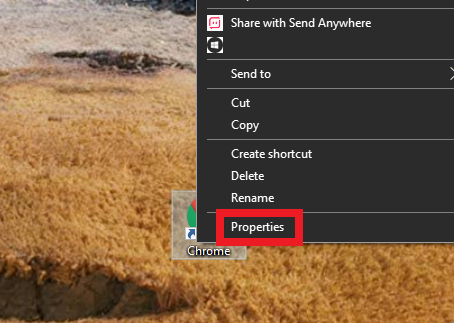
6. Right click the Chrome shortcut on your desktop and choose PROPERTIES
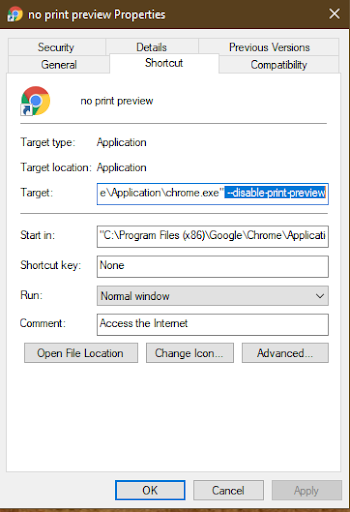
7. Add –disable-print-preview to the end of Target.
8. Close out of all Chrome Windows
9. Right click the Chrome icon in your bar and choose to unpin.
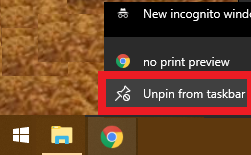
10. Drag the icon you updated the target for onto your bottom bar.
If you have a MAC:
When printing from a MAC you should always PRINT USING SYSTEM DIALOG instead of just clicking PRINT in Google Chrome.
This ensures that the proper settings will be used.
1. Click the search in the upper right corner of your mac and type terminal and press enter.
2. Type this using a terminal :
defaults write com.google.Chrome DisablePrintPreview -boolean true

3. Press enter
4. Close out of Chrome or reboot your computer. All future print jobs should show the print dialog.
Otherwise you can just click PRINT USING SYSTEM DIALOG every time you print and then select Color or B&W once the print dialog opens up before you click print.
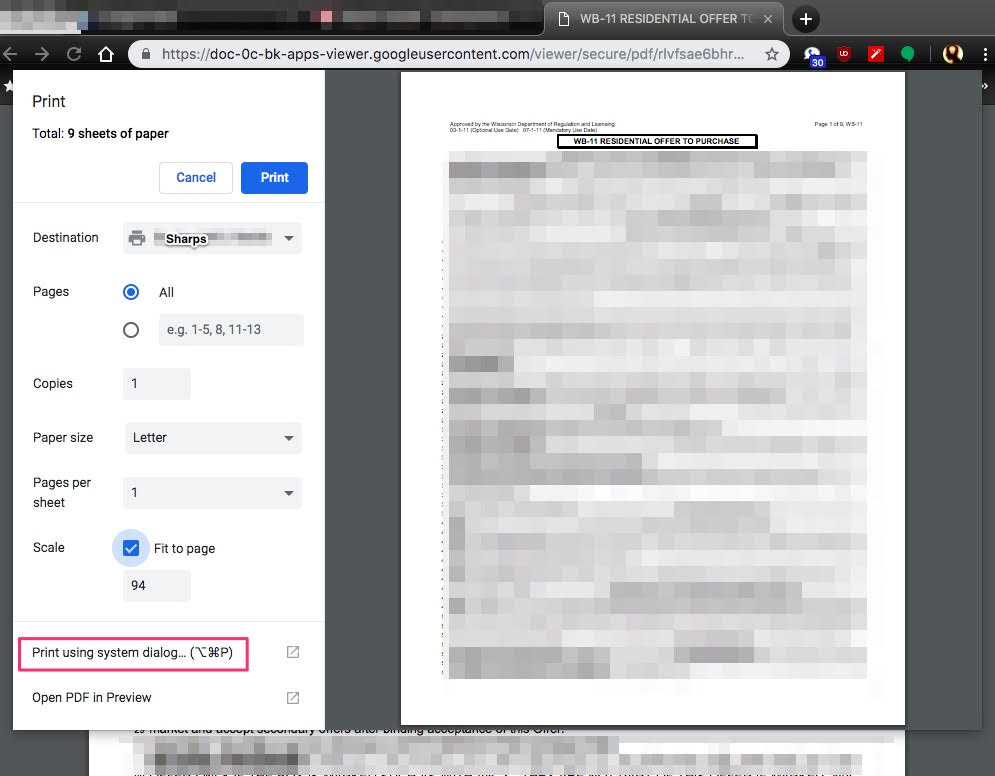
Please complete the check for both B&W and Color printing options:
5. Open any PDF on your computer
6. Click FILE and PRINT
7. Select SHARPS as the printer, select the preset B&W then click SHOW DETAILS
8. Click on PREVIEW and select COLOR
9. Ensure the print mode it set to 600dpi
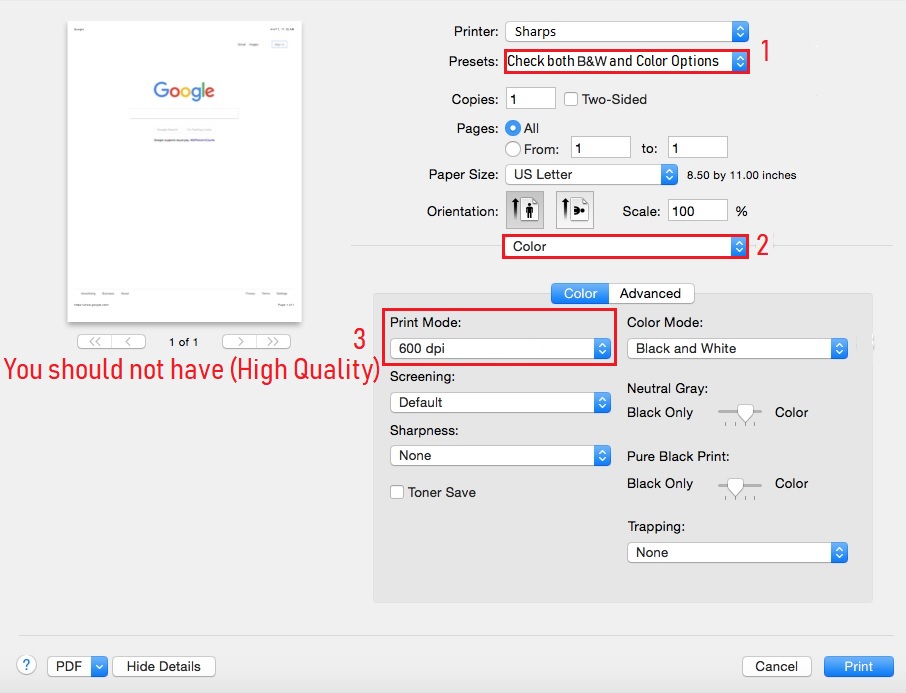
If you changed it from 600dpi (High Quality) to 600dpi
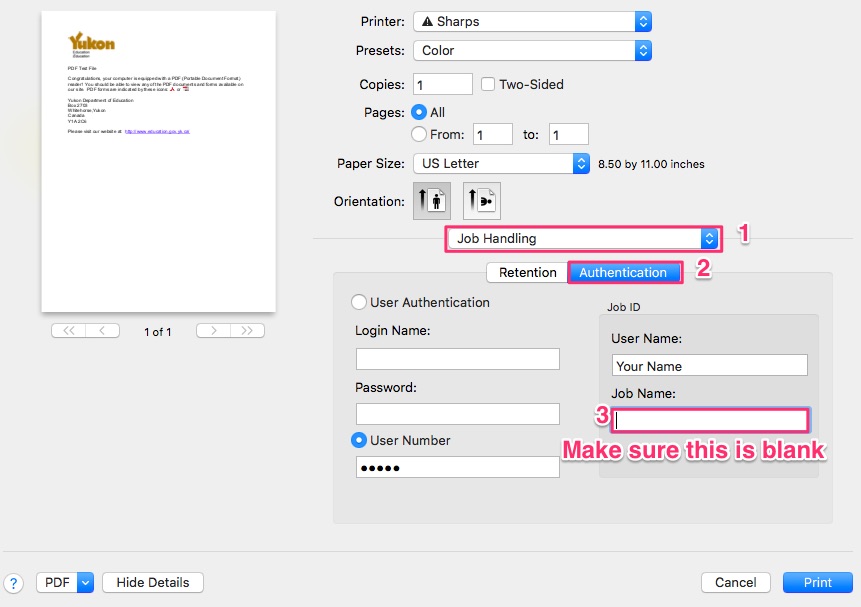
9a. Click COLOR and select JOB HANDLING and then AUTHENTICATION and delete anything in the JOB HANDLING box.
9b. Then Click B&W in the PRESETS box again on the top and select SAVE CURRENT SETTINGS AS PRESET…
9c. Make sure the PRESET NAME is set to B&W not B&W-1 and click OK
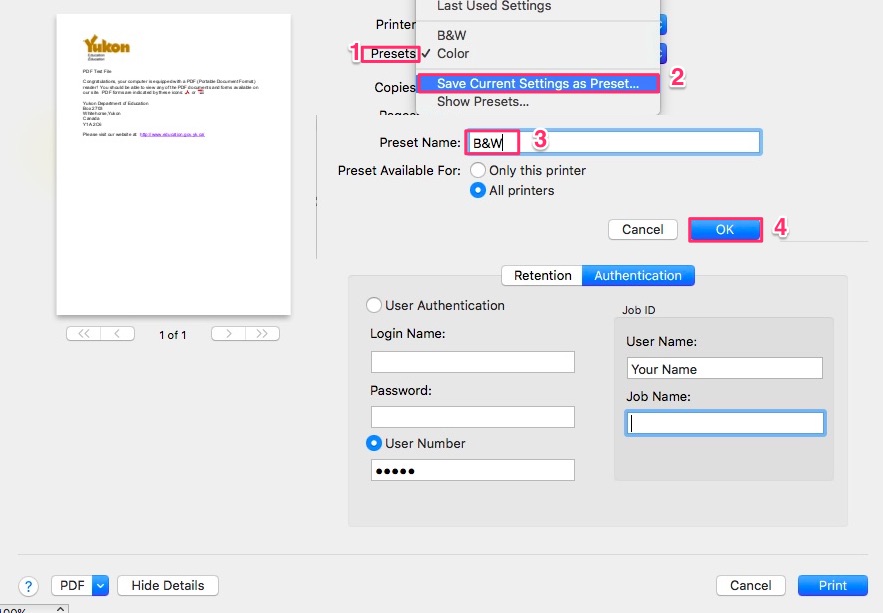
10. Repeat steps 9a-c but this time with Color instead of B&W.