Sharp Copier Installation Instructions

Call Marco Support at 800-847-3098
Let them know you are a Coldwell Banker Real Estate Group Agent/Staff and need the Sharp Copier installed. If Marco is not available or you prefer to have our internal IT assist you can submit a ticket to helpdesk@coldwellhomes.com
To attempt self installation please see directions below
Drivers for Windows or Macintosh can be downloaded from here
Windows Installation
Step 1) Go to Sharp driver download website by clicking here
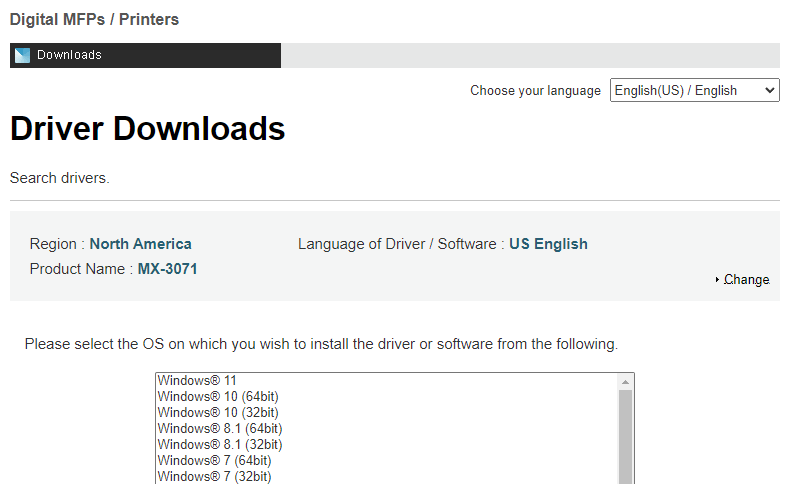
Select the correct driver for your system (either Windows 11 or Windows 10 64bit)
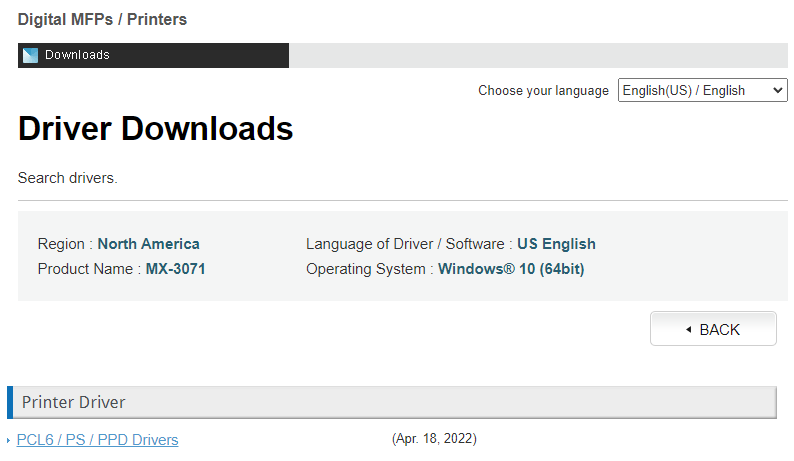
Then click on PCL6 / PS /PPD Drivers
Scroll to bottom of next page and select Download:

Select save location to somewhere you can get to such as your desktop or downloads folder.
Once download has completed go ahead and run the program.
Step 2) On Setup Window select Next > Program will extract and run Sharp Driver Installation.
Select Standard Installation

Program will search network for Sharp copiers to install, if given a choice between different machines select the one with either printer.lan / printer.cb.local / printer.arpa > Click Next > Next

Click Install > Finish

Step 3) Add you copier code to the Sharp MX-3071 driver
Click start menu then type Control Panel > Open

Click View device and printers under Hardware and Sound > Under Printers right click on Sharp MX-3071 PCL6 > Printing Preferences
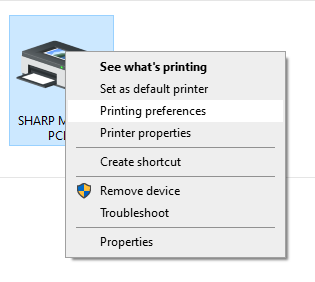
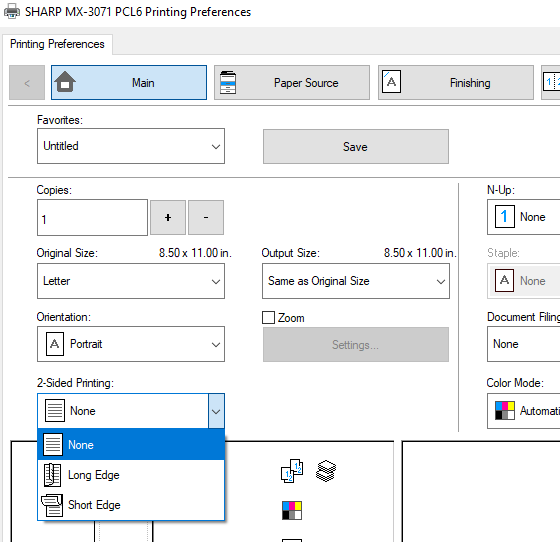
On Main tab 2-Sided Printing: Long Edge > change to None
On fifth tab Job Handling > place check on Print Release > Authentication: None change to User Number. Then add your personal copier code to User Number: (typically zero and the last four of your cell phone number) > Click Apply > Click OK
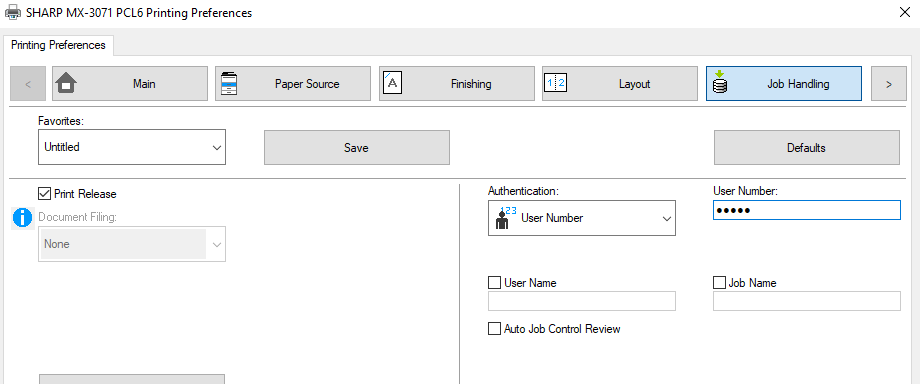
To verify everything was configured correctly, go ahead and click print and then verify at the copier under your print queue that you see the job you just submitted.
If you have any issues with this process or questions, please feel free to submit a ticket to helpdesk@coldwellhomes.com
MacOS Installation
Step 1) Identify the version of OS you are using:
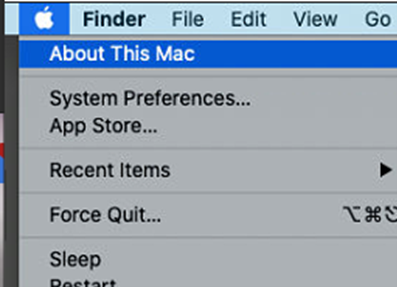
Click the Apple in the top left corner and select About this Mac:
The screen that displays will show you what version you are currently running:
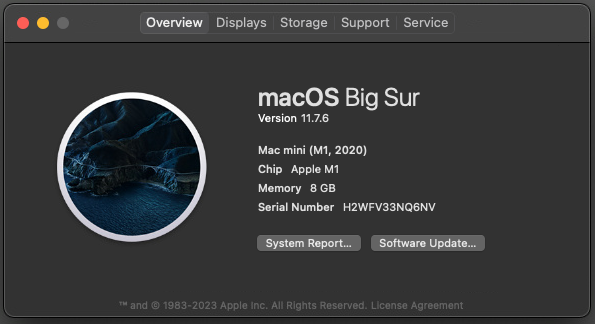
Close this window.
Step 2) Go to Sharp driver download website by clicking here
Select correct version according previous step > Select Mac PS Driver:

Scroll to bottom of next page and select Download:

Select save location to somewhere you can get to such as your desktop or downloads folder.
Step 3) Navigate to Sharp driver and open the .dmg file

Double click MX-C55 to start driver installation
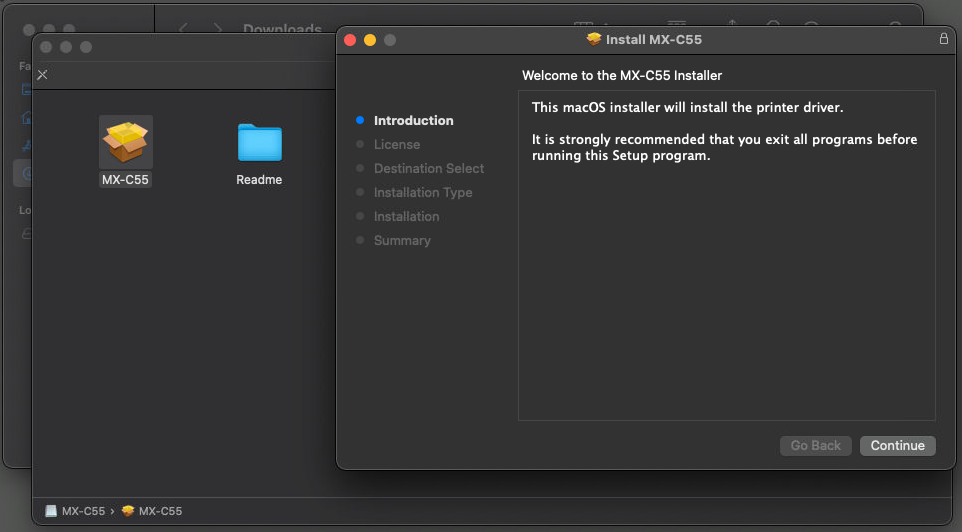
Select Continue > Continue > Agree
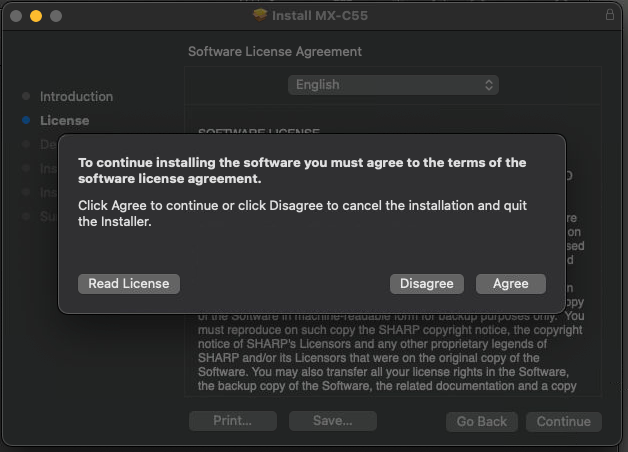
Select Continue > Install > Enter computer password used to login to computer > Install Software

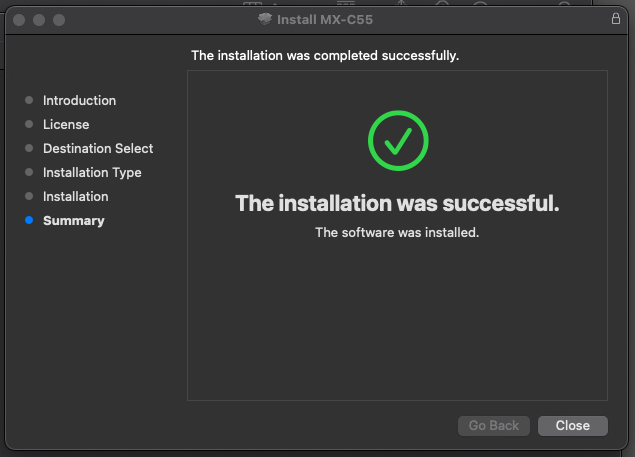
On successful installation > Select Close
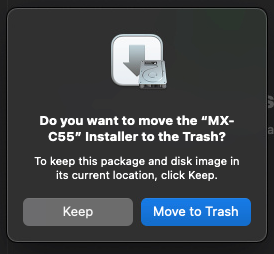
Move to Trash
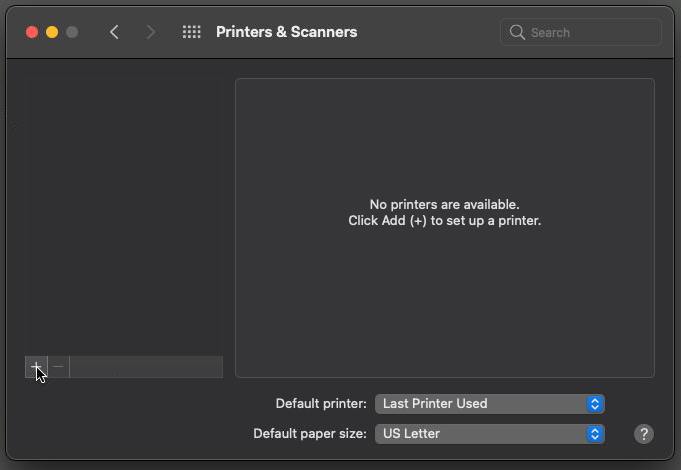
Step 4) Navigate to System Preferences > Printers & Scanners

On Printers & Scanners windows click on the + sign to add a new printer
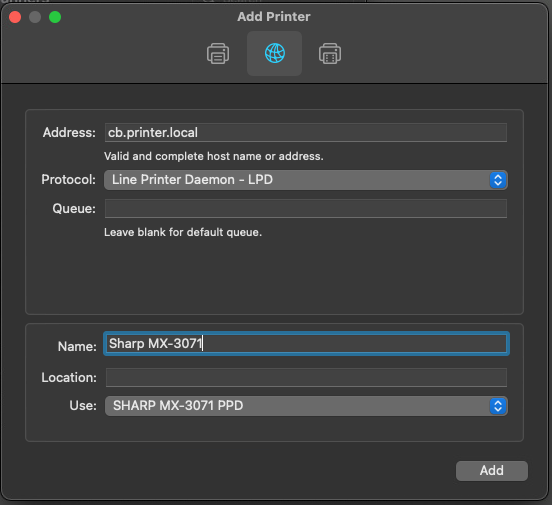
On Add Printer window select second tab (resembles globe) fill out the fields accordingly:
Address: printer.cb.local
Protocol: Line Printer Daemon – LPD
Update name from printer.cb.local to Name: Sharp MX-3071
Use: SHARP MX-3071 PPD (should populate automatically when installing at an office)
Click Add
On copier Settings windows update the following:
Input Tray Options: Large Capacity Desk
Output Tray Options: Inner Finisher
Click OK

Close out of Printers & Scanners window.
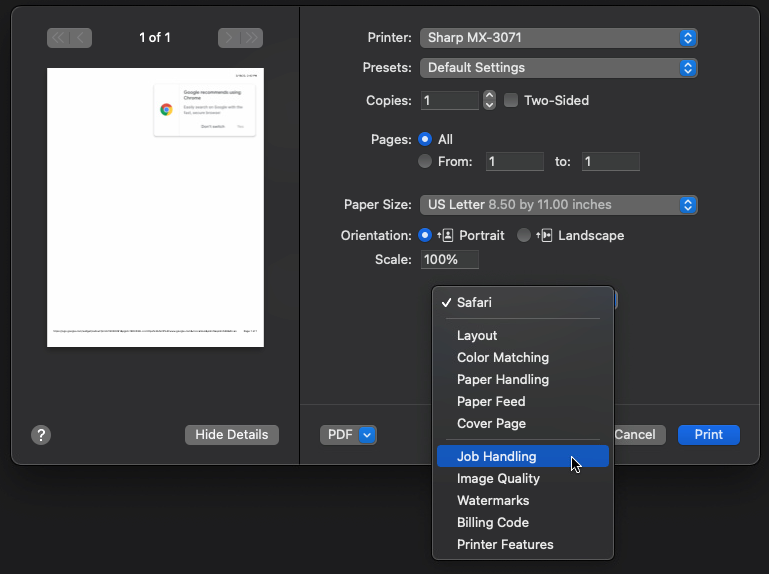
Step 5) Open a program to add your personal copier code to your copier driver. In this example we will open Safari and click File > Print or Command-P to bring up your printer window. Make sure Printer is set to your newly created Sharp MX-3071 printer then select Show Details:

Then click drop down to select Job Handling:
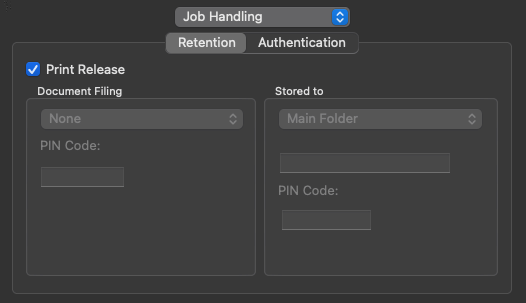
On Job Handling window Retention tab > place a check next to Print Release
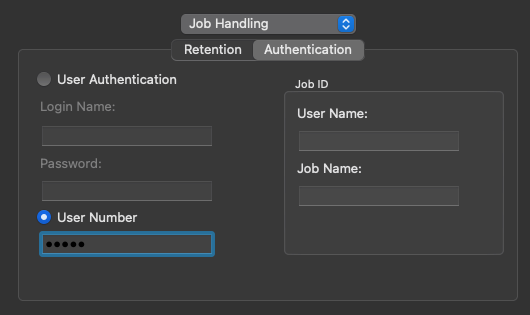
On same window select Authentication tab and clear the User Name Job Name field then enter your personal copier code under User Number (typically zero and the last four of your cell phone number)
Then at the top the print window click the drop down under Presets and select Save Current Settings as Preset… > update Preset Name: Automatic > Select OK
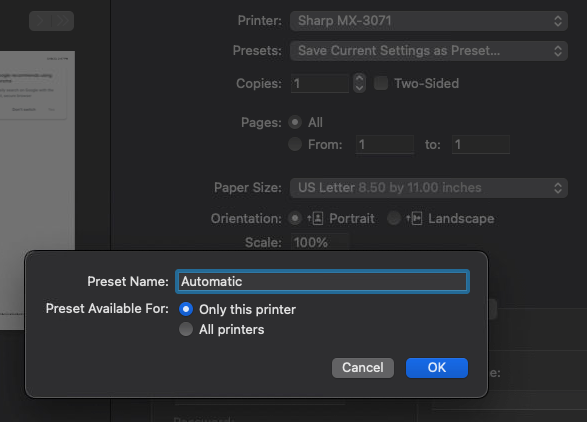
To verify everything was configured correctly, go ahead and click print and then verify at the copier under your print queue that you see the job you just submitted.
If you have any issues with this process or questions, please feel free to submit a ticket to helpdesk@coldwellhomes.com
***Please note if you primarily use Google Chrome to print from, we recommend disabling the print preview as the Chrome does not send your copier code from the print preview screen so you jobs will be rejected at the copier***
To disable the Google Chrome print preview, follow the steps below:
1. Make sure to quit out of Google Chrome. To do this, right click on the Google Chrome icon, and click Quit.
2. Launch Terminal on your Mac. This can be found by going to Applications -> Utilities.
3. Type in defaults write com.google.Chrome DisablePrintPreview -bool true
4. Click out of Terminal and open Google Chrome.
5. Click Command+P or go to File -> Print.
6. Check the default printer option from OS X now in use with the Google Chrome browser app.
To enable the Chrome print preview, follow the steps below:
1. Make sure to quit out of Google Chrome. To do this, right click on the Google Chrome icon, and click Quit.
2. Launch Terminal on your Mac. This can be found by going to Applications -> Utilities.
3. Type in defaults write com.google.Chrome DisablePrintPreview -bool false
4. Click out of Terminal and open Google Chrome.
5. Click Command+P or go to File -> Print.
6. Check the default printer option from OS X now in use with the Google Chrome browser app.
Konica Minolta Copier Installation Instructions
Internal IT assist you can submit a ticket to
helpdesk@coldwellhomes.com
To attempt self installation please see directions below
Macintosh can be downloaded from here
Windows Driver can be downloaded from here
Windows Installation
Step 1) Windows Driver can be downloaded from here
Select save location to somewhere you can get to such as your desktop or downloads folder.
Once download has completed navigate to download location
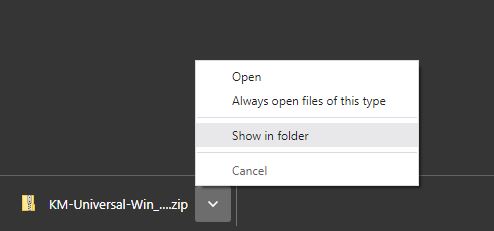
> Extract All…
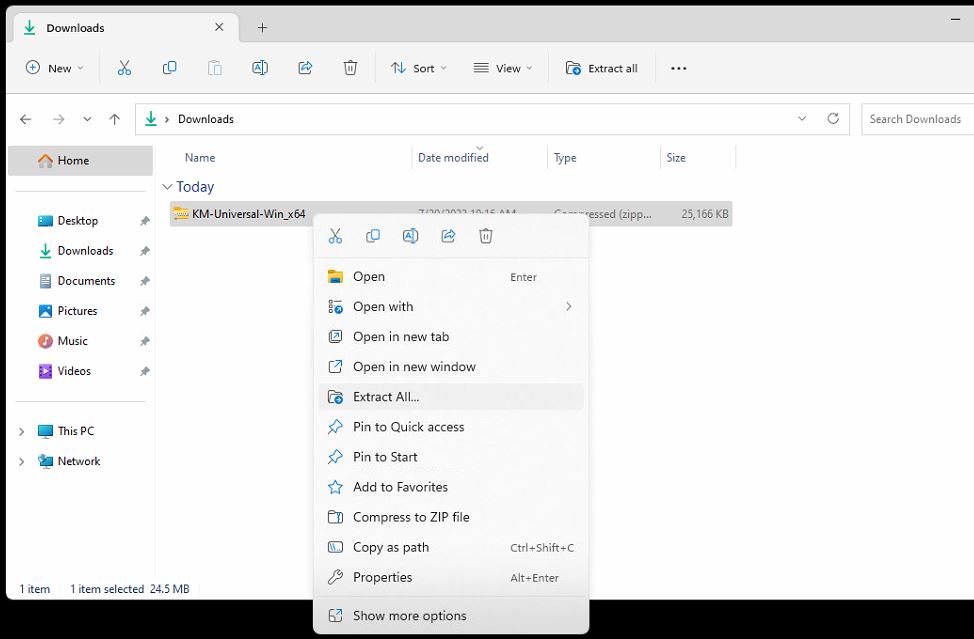 > Extract > Extract
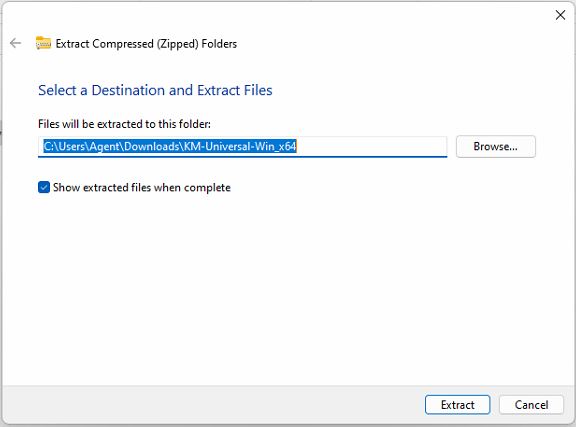
Step 2) Navigate to Control Panel
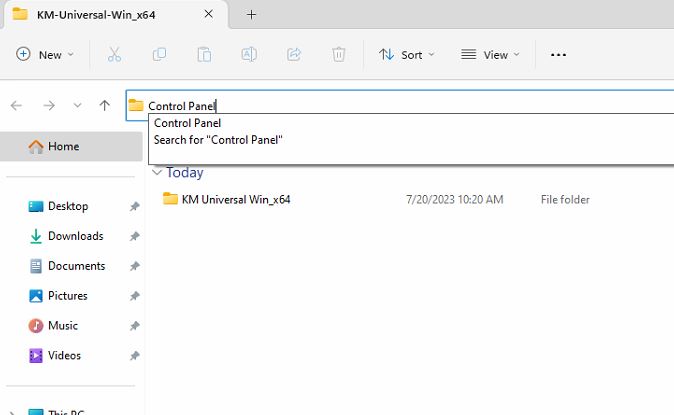
> Select View devices and printers
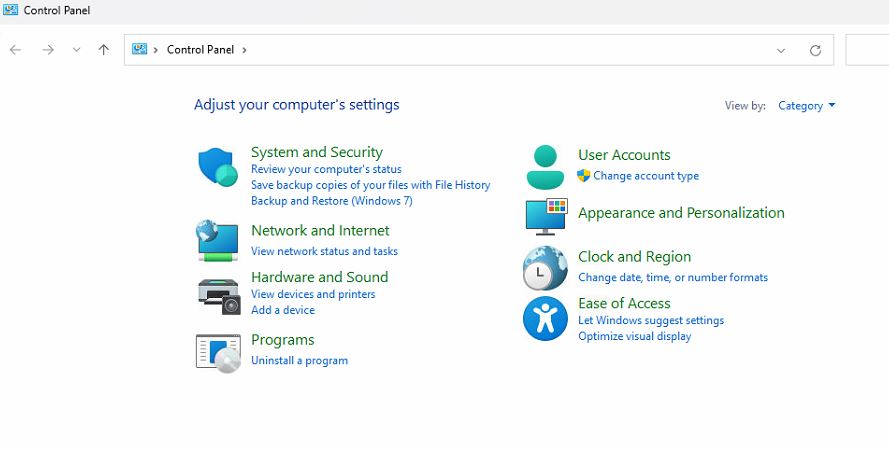
> Select Printers & scanners
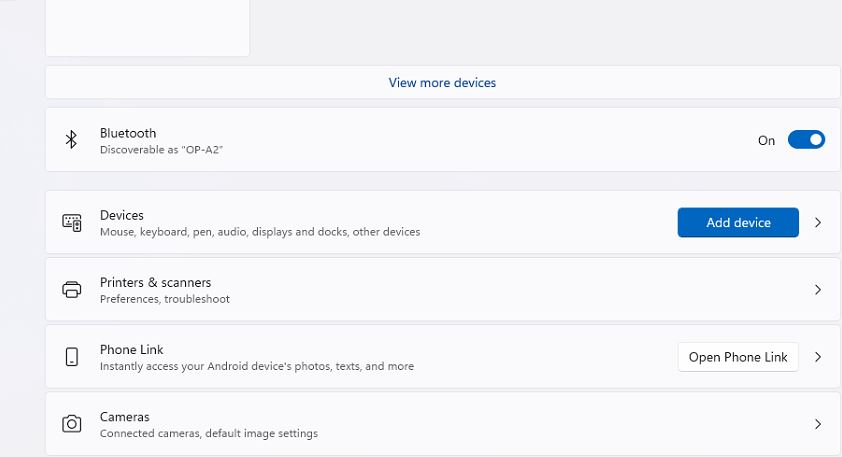
> After a few seconds, Select Add manually

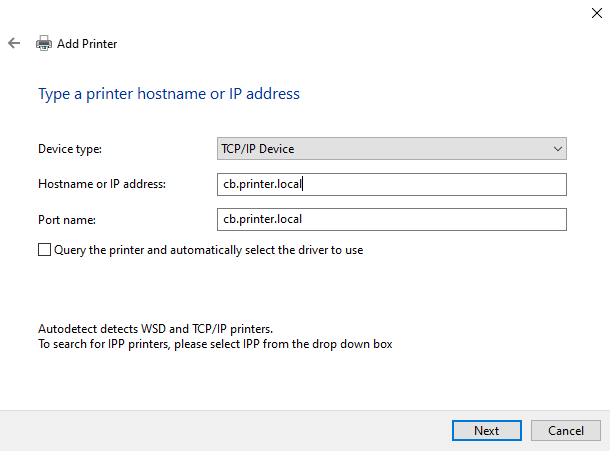
Step 3) Select Add a printer using an IP address or hostname, click Next
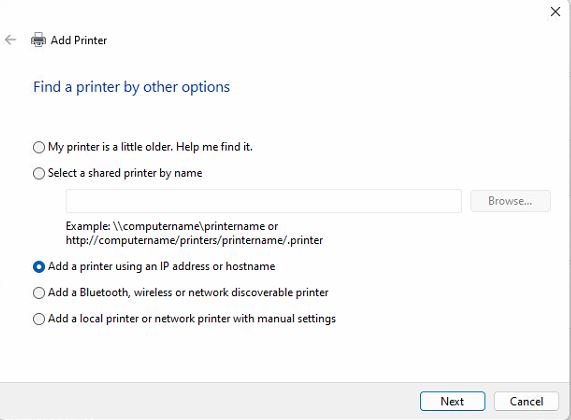
> Click the drop down and select:
Device type: TCP/IP Device
Hostname or IP address: printer.cb.local
Click Next
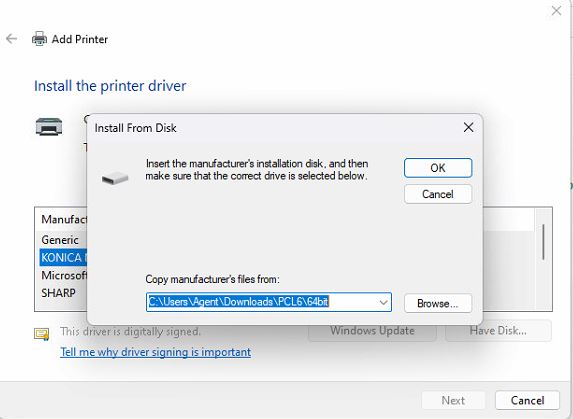
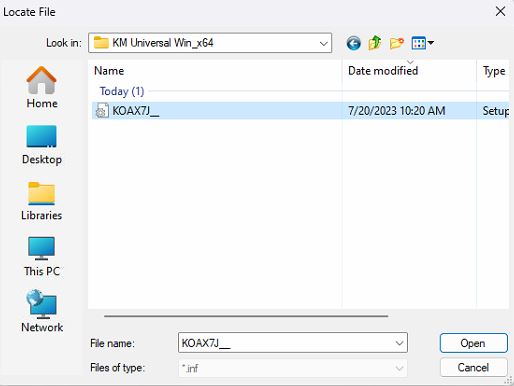
> Select Have Disk… then Browse…
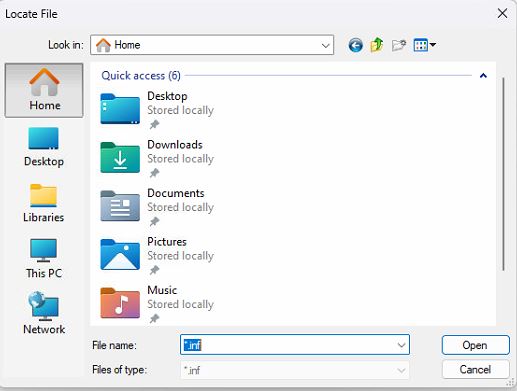
> Navigate to the extracted driver folder, in this example we extracted it to the Downloads folder
Click Home > Downloads
> Open KM-Universal-Win_x64 folder
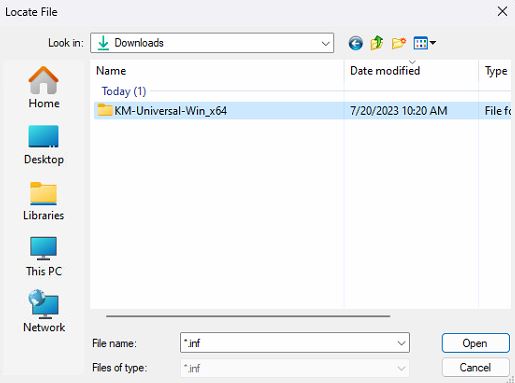
> Select KOAX7J_ then click Open
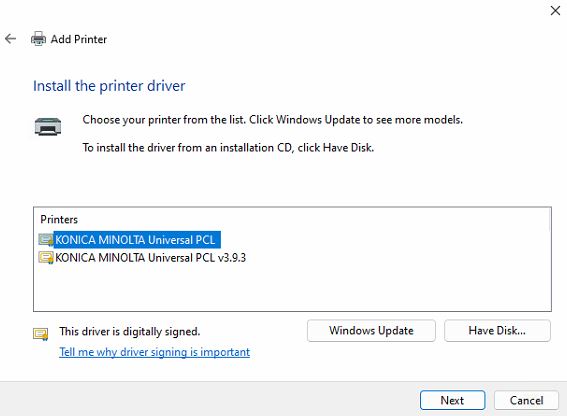
> Select KONICA MINOLTA Universal PCL > Next
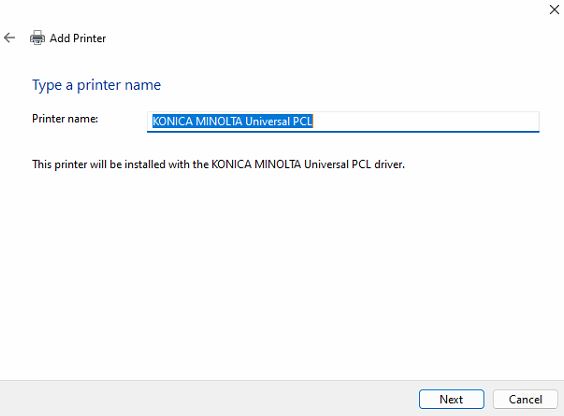
> Name the copier what you would like to call it, in this example we will leave it the default, Click Next
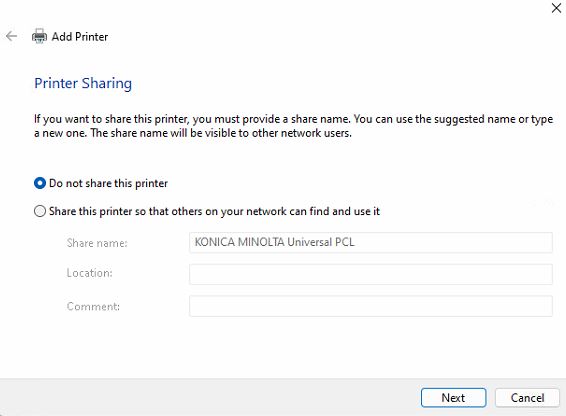
> Make sure to select Do not share this printer, Click Next
> Select Finish
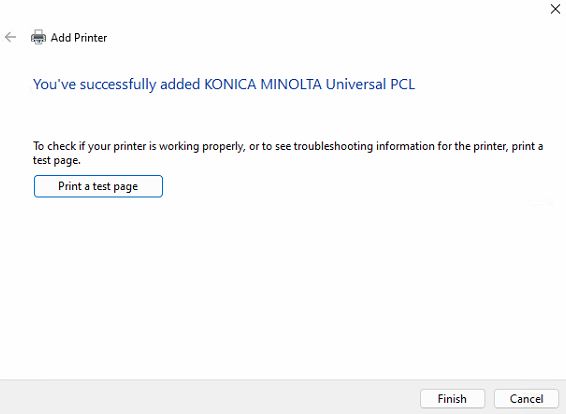
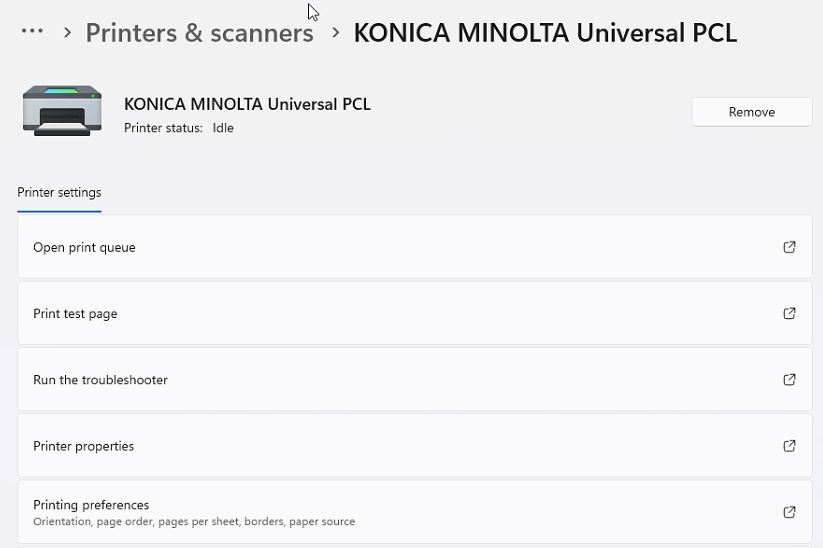
Step 4 (optional) Turn off two sided printing by selecting the newly installed KONICA MINOLTA

> Select Printer preferences
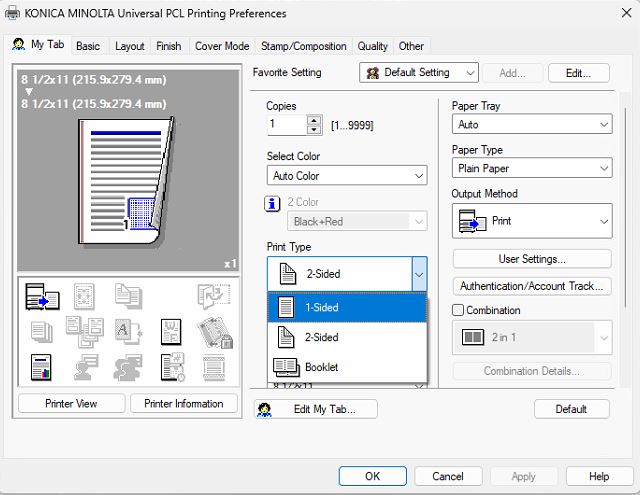
> Click drop down Print Type: 1-Sided, Click Apply > OK
To verify everything was configured correctly, select Print a test page, then verify at the copier that your test print has successfully printed.
If you have any issues with this process or questions, please feel free to submit a ticket to helpdesk@coldwellhomes.com
MacOS Installation
Step 1) Macintosh can be downloaded from here
Select save location to somewhere you can get to such as your desktop or downloads folder.
Once download has completed navigate to download location and open the .pkg file
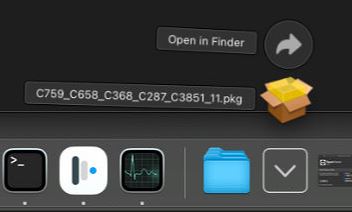
> Select Continue
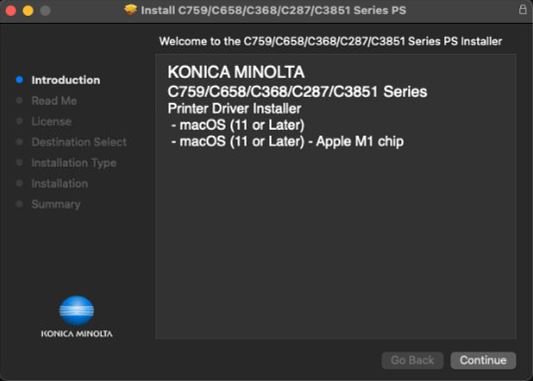
> Select Continue
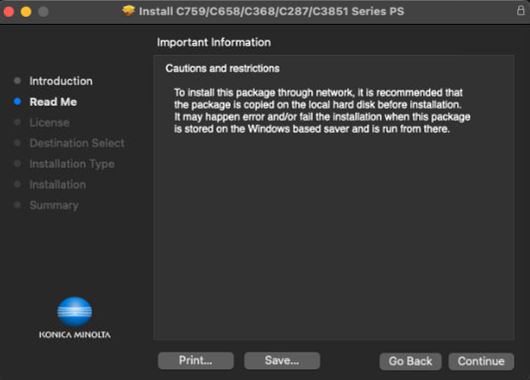
> Select Continue
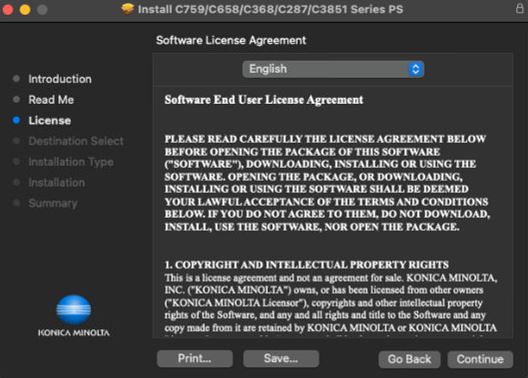
> Select Agree
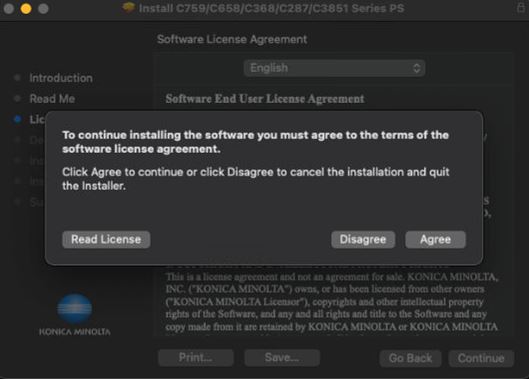
> Select Install

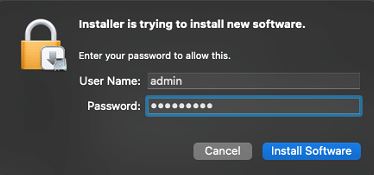
> Enter your admin credentials for the computer (password used to login to computer), Select Install Software
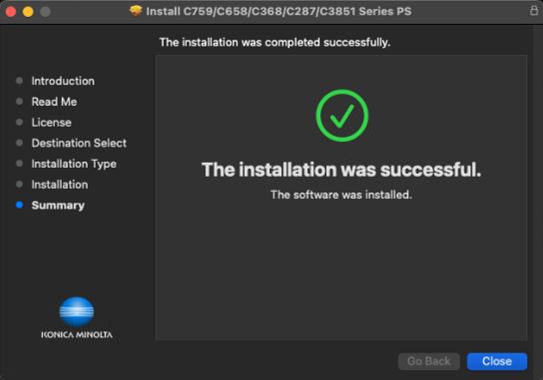
> Select Close
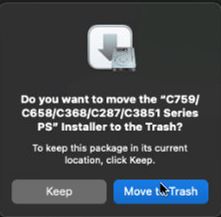
> Then select Move to Trash as we no longer need the .pkg file
Step 2) Navigate to your System Preferences… Printers & Scanners

> Click + symbol to add a new printer

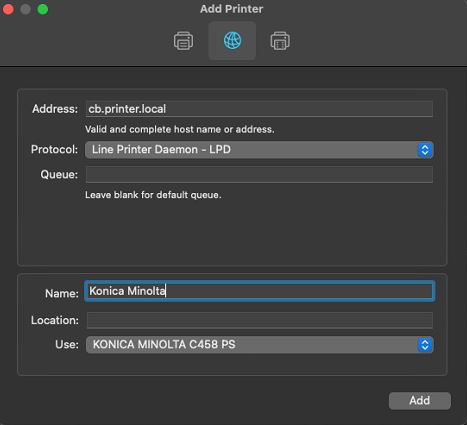
> On the Add Printer window select second tab (resembles globe) fill out the fields accordingly:
Address: printer.cb.local
Protocol: Line Printer Daemon – LPD
Update name from printer.cb.local to Name: Konica Minolta
Use: KONICA MINOLTA C458 PS (should populate automatically when installing at an office)
Click Add
> Click OK
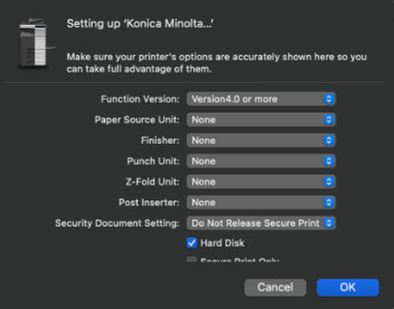
> After selecting OK you can close out of your system preferences
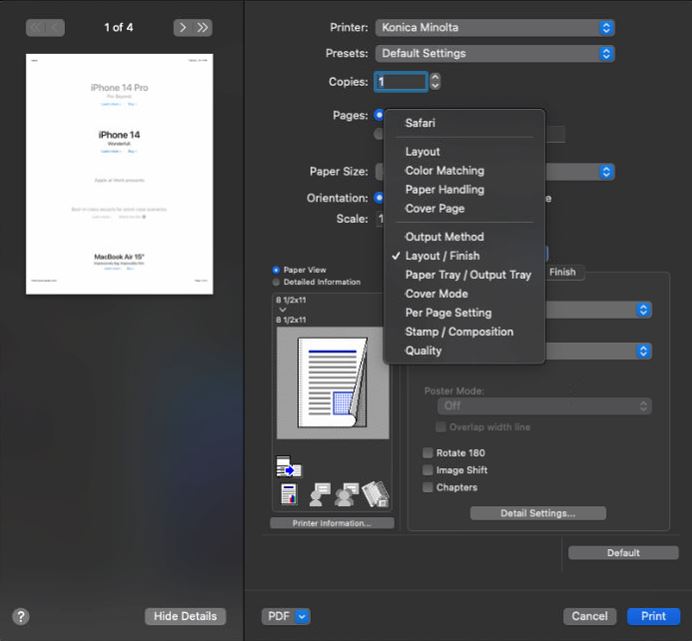
Step 3 (optional) Navigate to a program where you can send a test print from. In this example we will use Safari (but any program you can print from should work).
> On the print page select the drop down and select Layout / Finish
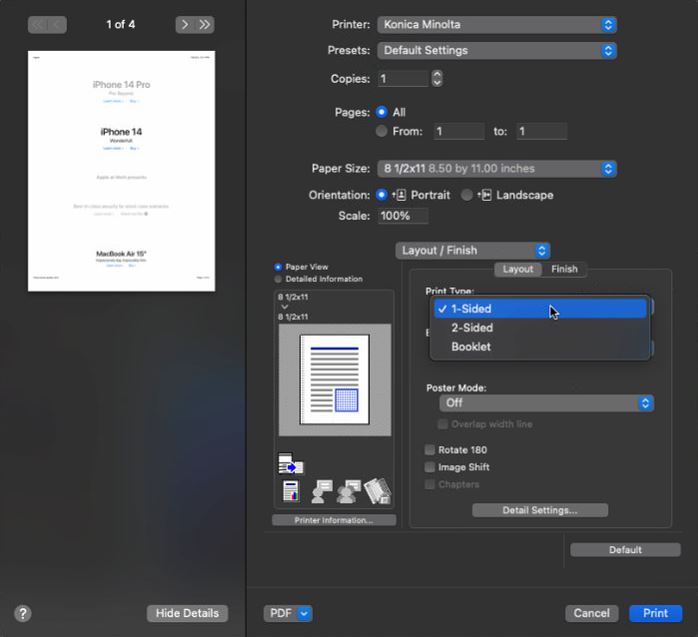
> Under Print Type: change from 2-Sided > 1-Sided
> To keep your printer from reverting back to 2-Sided printing, save this change as a Presets, here we will name is Automatic
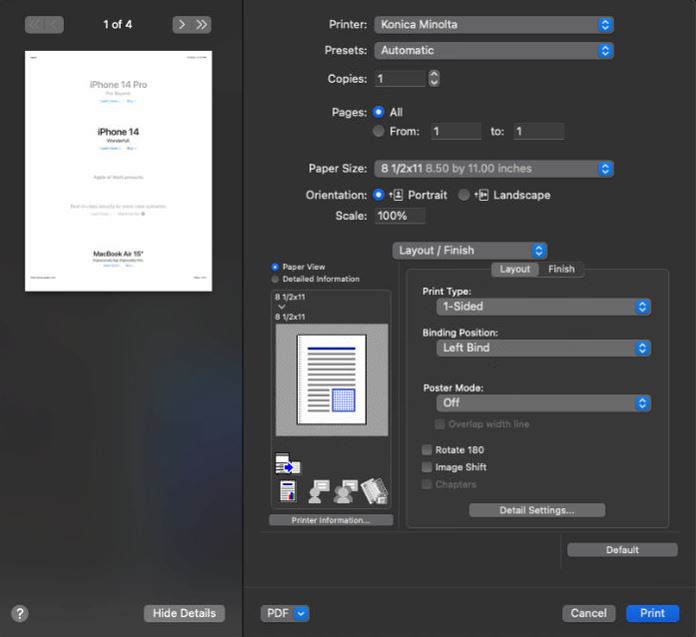
To verify everything was configured correctly, go ahead and click print, then verify at the copier that your test print has successfully printed.
If you have any issues with this process or questions, please feel free to submit a ticket to helpdesk@coldwellhomes.com |


