It is important to consolidate your contacts from your iCloud account and personal email accounts to ensure adding a contact on your phone adds the contact to your synced email on your computer. After adding the contact to your phone you can quickly import that contact into ZAP as well for email marketing purposes, marketing mailers / labels, home search monitoring, and requesting your past clients to write you reviews to benefit your online presence.
Click here for a printable guide
Set your phone to sync your company contacts
Step 1: If you have an iPhone: Check your phone for all email accounts and an iCloud login if you use an iPhone or iPad.
Go to SETTINGS -> PASSWORDS & ACCOUNTS -> Ensure that only your coldwellhomes.com account is syncing your contacts.


Step 2: (If you use an iPhone) Turn off iCloud and choose KEEP CONTACTS
Step 3: (If you use an iPhone) Turn on iCloud if you use an iPhone contact syncing to ensure contacts that weren’t uploaded have uploaded to iCloud
Step 4: (If you use an iPhone) Turn off iCloud contact syncing and choose to DELETE CONTACTS
Step 5: Ensure your Coldwellhomes.com account is the only account syncing contacts if you want all contacts to sync there.

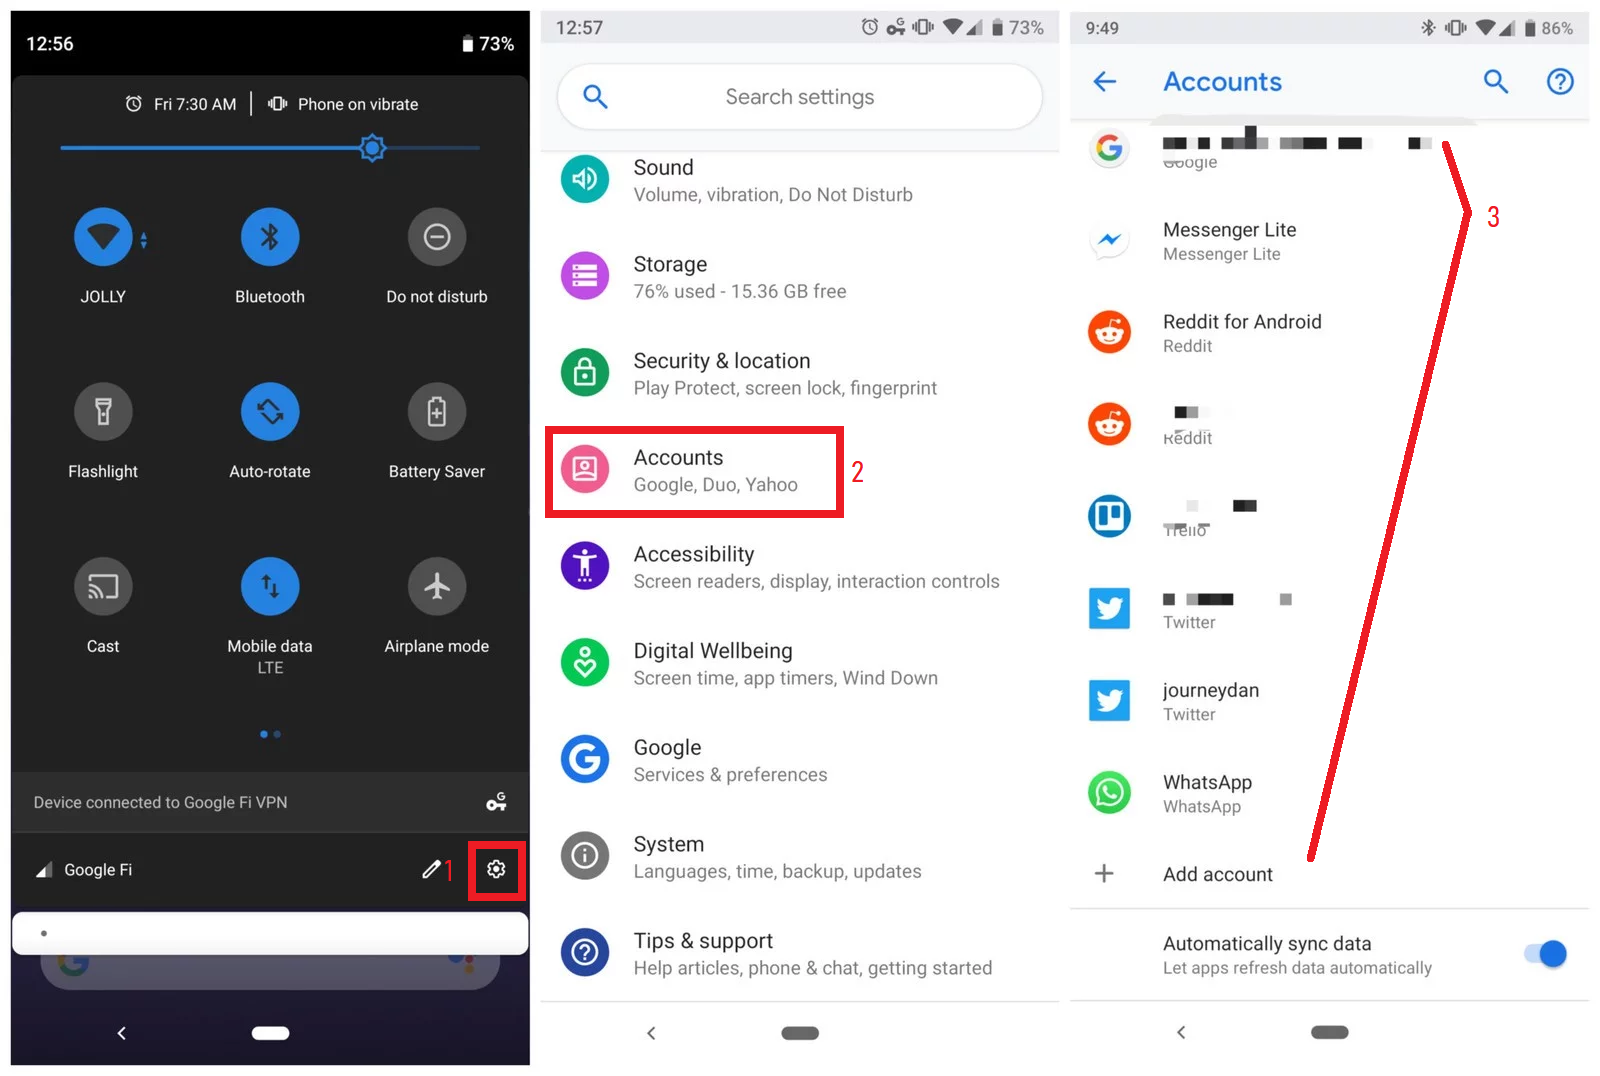
Step 6: If you have an ANDROID – Check your phone for all syncing accounts
Open your device’s Settings app Settings -> Tap Accounts (If you don’t see “Accounts,” tap Users & accounts) -> Turn off the auto-sync for all besides your coldwellhomes.com account if that’s where you want everything to sync.
Export your contacts from all accounts on your computer
Step 7: Login to every email account on your computer and export the contacts. (Gmail, Yahoo, Hotmail, AOL, Top Producer, ect)
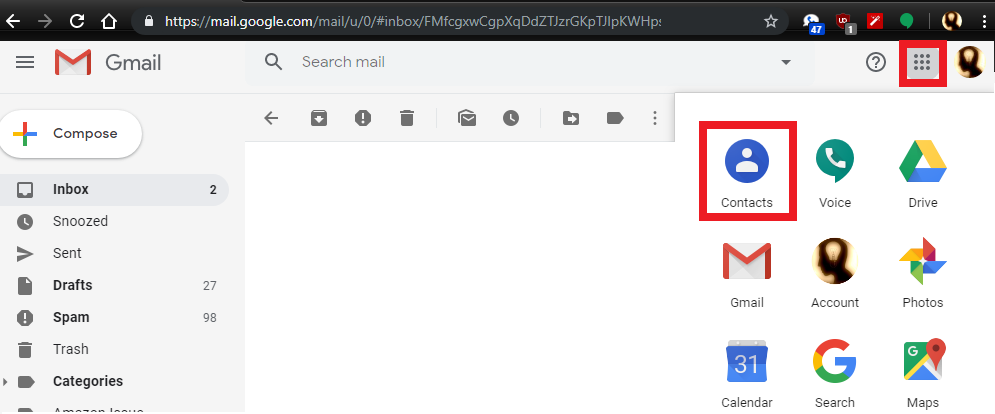
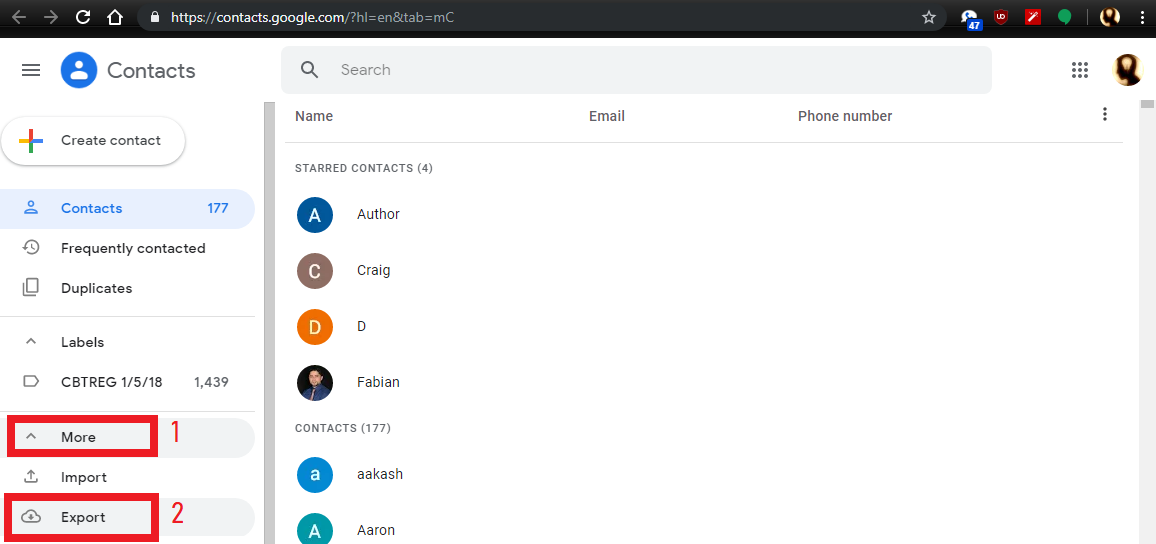
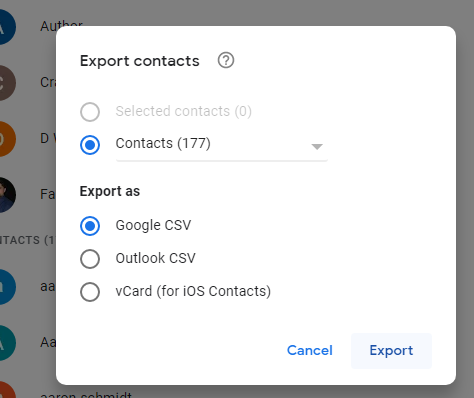
From your Personal Gmail account – Click Gmail -> Contacts -> Click More -> Click Export -> Select ALL CONTACTS -> Select Outlook CSV format -> Click Export
From your Yahoo account – Click Contacts -> Click More -> Click Export -> Select ALL CONTACTS -> Select Outlook CSV format -> Click Export
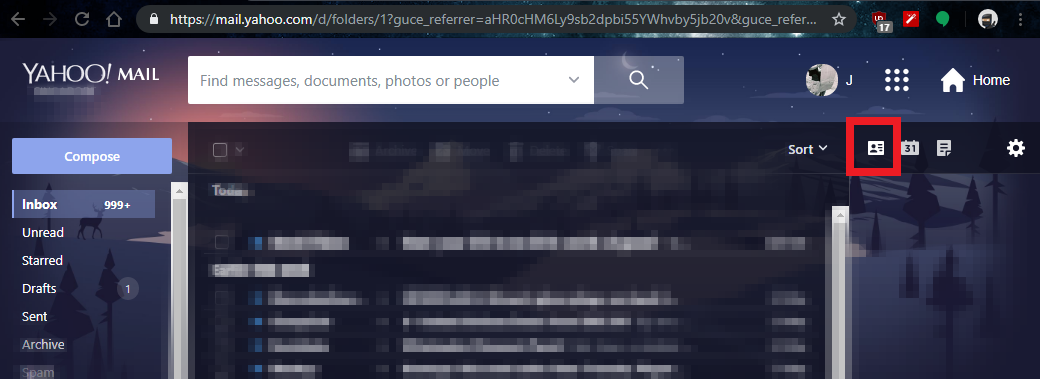
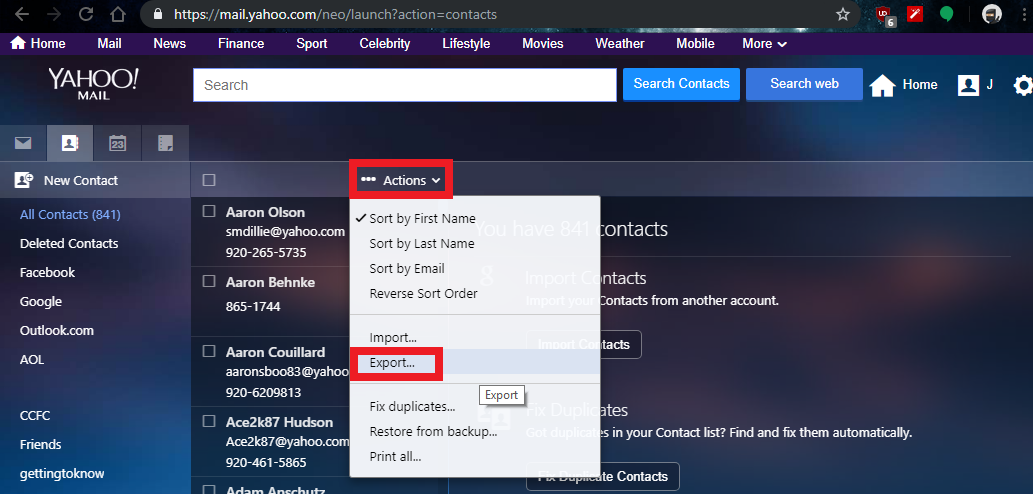
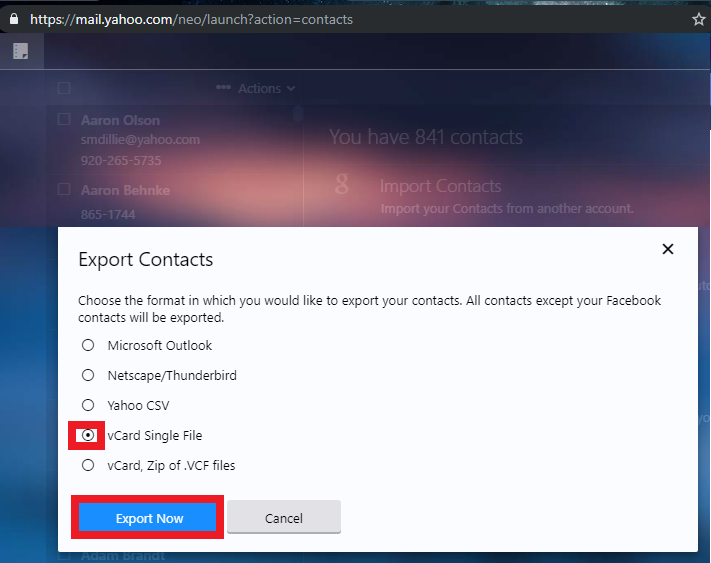
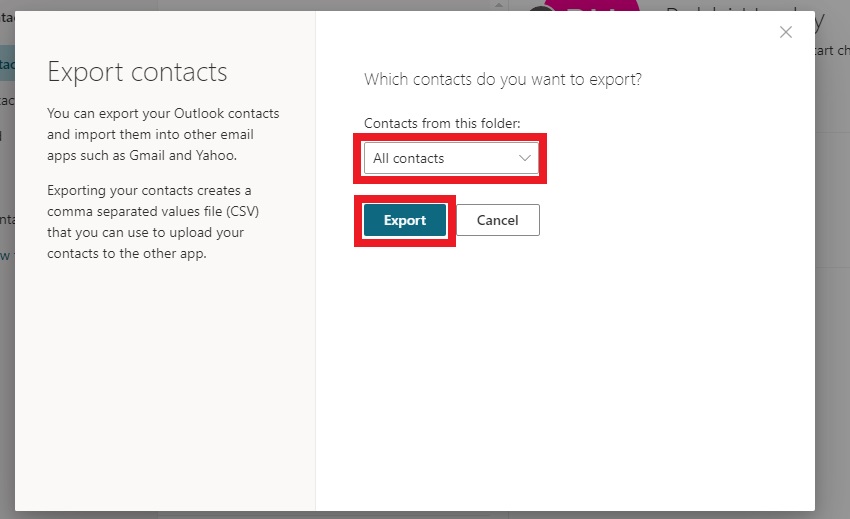
HOTMAIL – From your Gmail account, click Gmail -> Contacts -> Click More -> Click Export -> Select ALL CONTACTS -> Select Outlook CSV format -> Click Export

AOL – Log in to AOL WebMail -> click CONTACTS -> click TOOLS and EXPORT – > Choose COMMA SEPARATED VALUE (CSV) -> Export -> Save the file to your computer.

TOP PRODUCER – From your Top Producer account -> Click SEARCH FOR CONTACTS from the Contacts menu in the main menu bar. -> Click SEARCH -> Click EXPORT CONTACTS -> Select ALL CONTACTS, CSV, and CONTACT RECORD AND ALL ASSOCIATED ITEMS and then EXPORT.


Step 8: (If you use an iPhone) Login to iCloud.com with your Apple ID and Password and export your contacts as an ICF file.
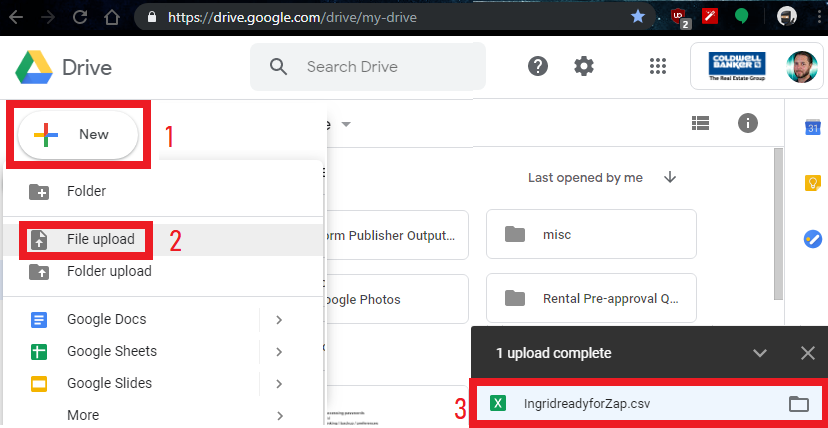
Step 9: Upload each of the CSV files to Google Drive, open them and remove unneeded columns.
Step 10: Edit and remove / rename all columns to be the following (We recommend you copy and paste / replace as follows:
Given Name, Family Name, E-mail 1 – Type, E-mail 1 – Value, Phone 1 – Type, Phone 1 – Value, Phone 2 – Type, Phone 2 – Value, Address 1 – Type, Address 1 – Street, Address 1 – City, Address 1 – Region, Address 1 – Postal Code, Notes

It should look like this when you’re done:

Step 11: Export your edited contacts CSV files


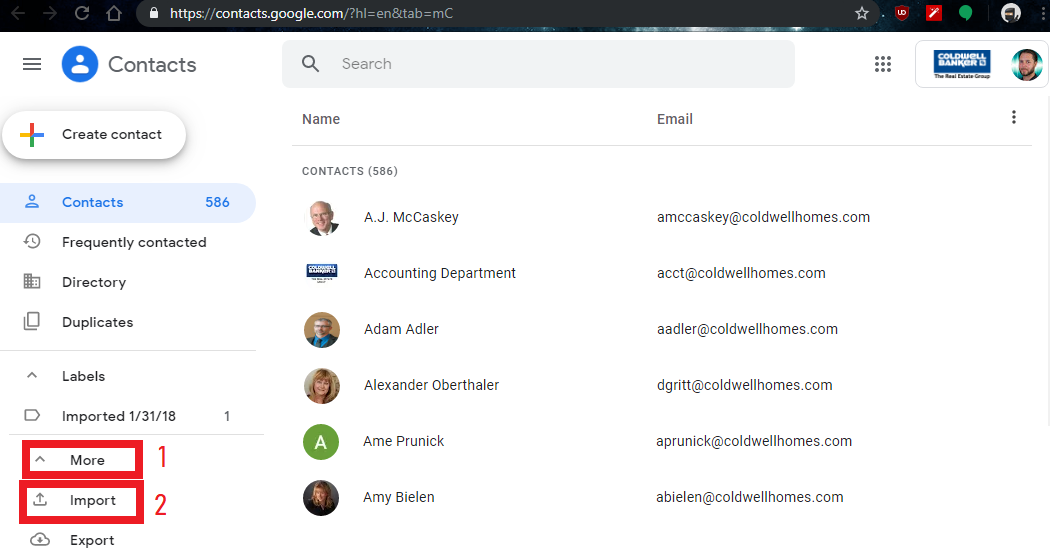
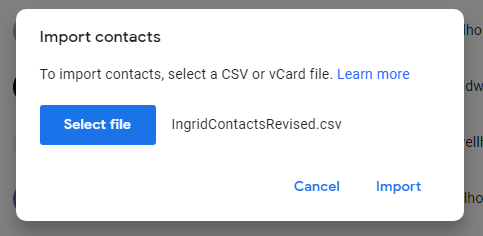
Step 12: Import all of your contacts into GSuite – Navigate to Google Contacts -> Click MORE -> Click IMPORT -> Select one of the ICF or cleaned up CSV files you exported earlier and IMPORT
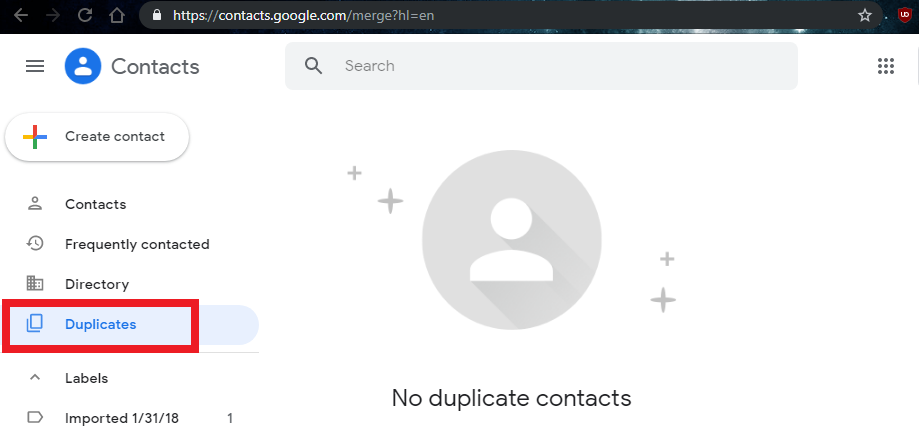
Step 13: Run Find and Merge Duplicate Contacts in your Coldwellhomes.com Gsuite account.
Export and Cleanup your CSV Contact Export and prepare it for import to ZAP
Step 14: Export contacts from Gsuite as a CSV file.


Step 15: Upload your CSV files to Google Drive and convert to Google Sheets by clicking the file once its uploaded.

Step 16: Edit and remove / rename all columns to be only First Name, Last Name, Email, Phone 1, Phone 2, Address, State, City, Zipcode, and Notes.

Step 17: Ensure all contacts have a first and last name, email address or phone number.
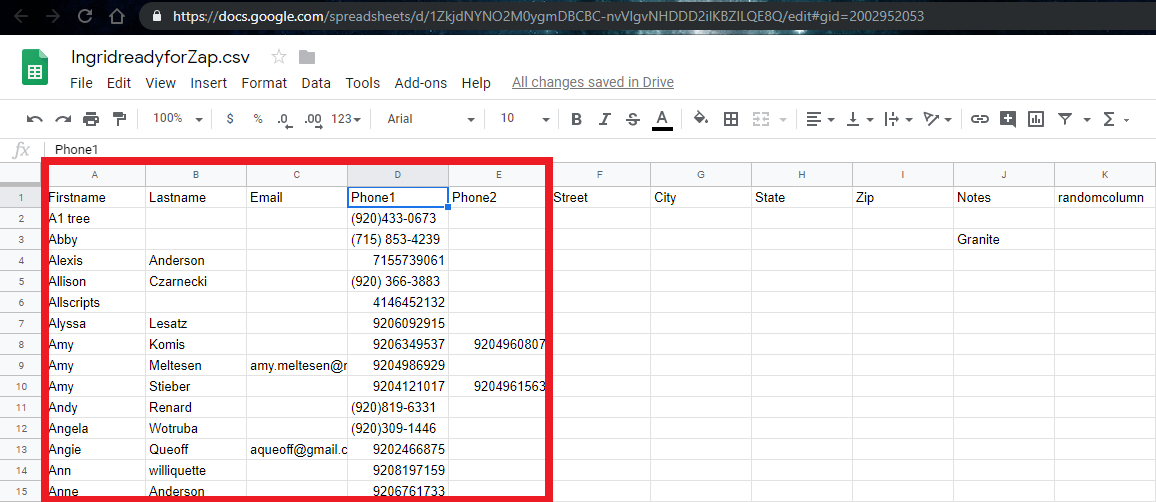
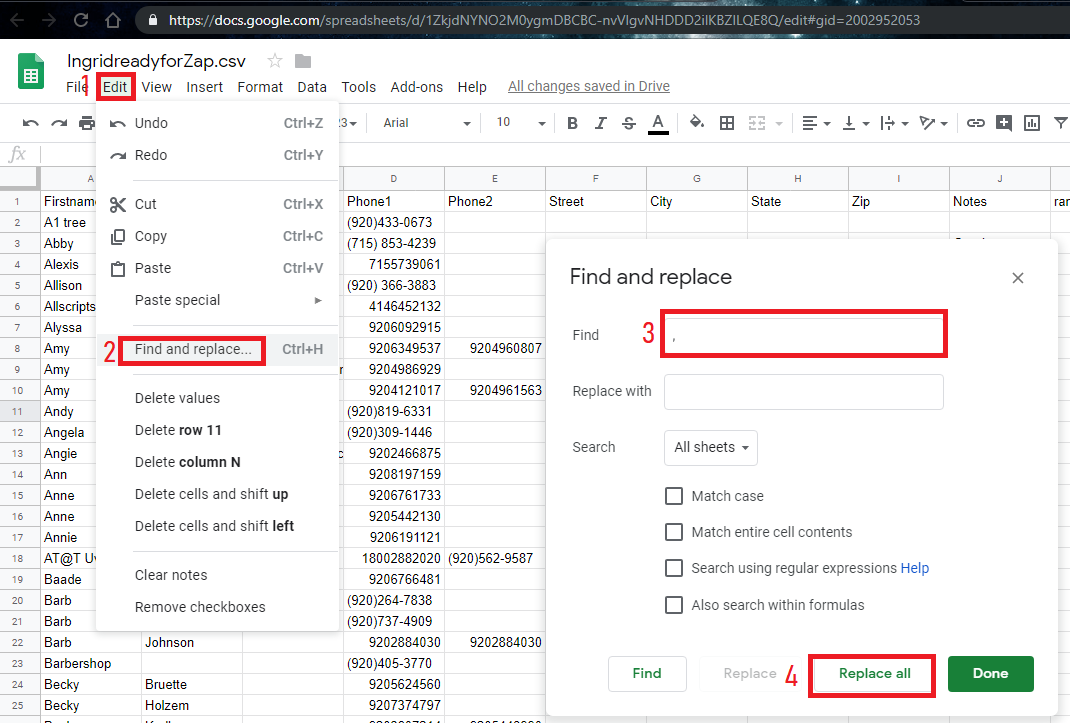
Step 18: Find and Replace all special characters including the following characters ,;)(#’
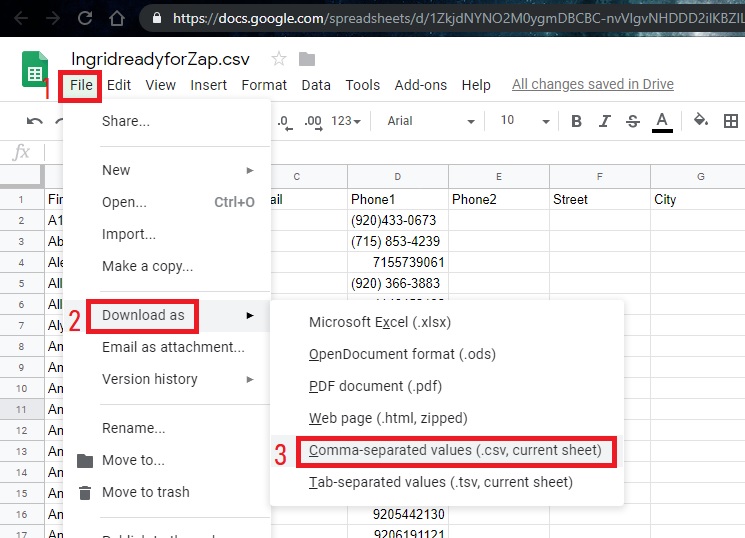
Step 19: Save and Export your CSV File
Import your CSV File to ZAP
Step 20: Login to Zap and choose CONTACTS -> NEW CONTACT -> IMPORT CONTACTS -> UPLOAD A CSV FILE -> Select the appropriate columns -> IMPORT
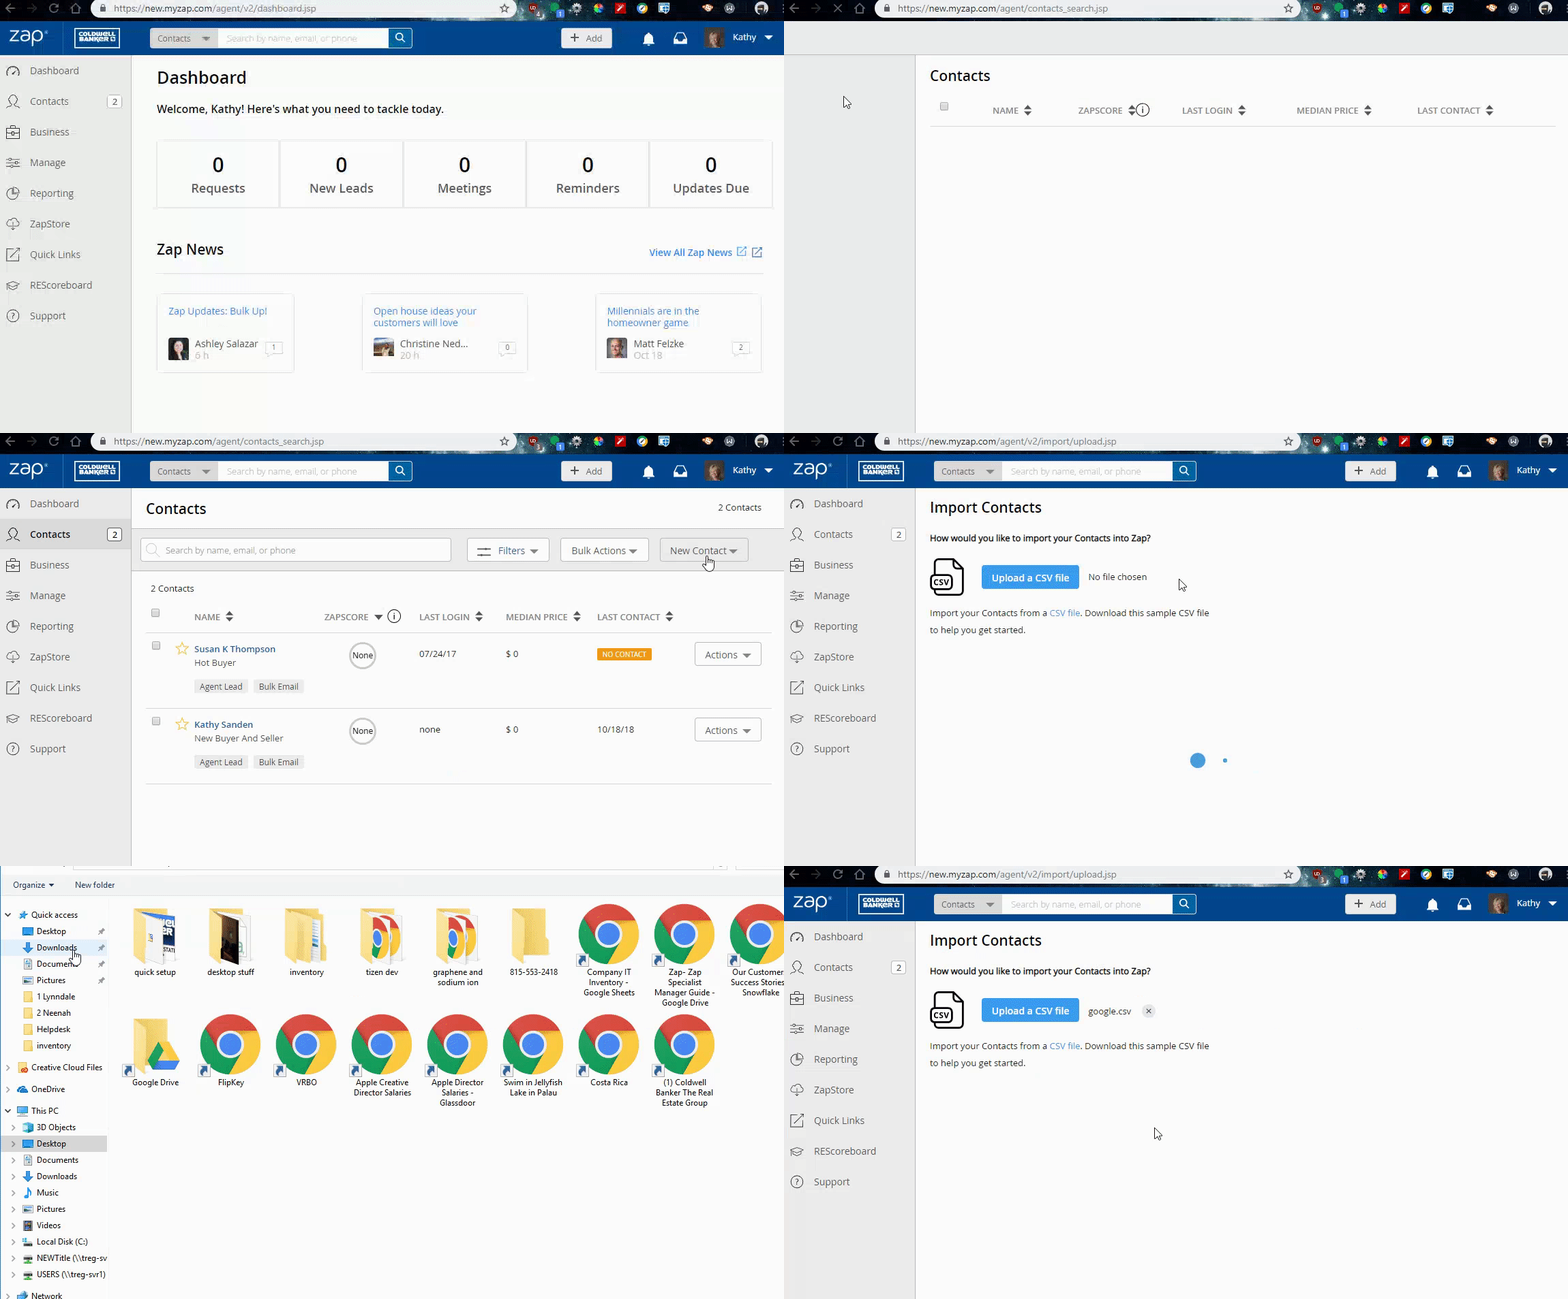
Step 21: Select appropriate columns for each column and click IMPORT.